GETTING STARTED WITH FAXTOOLS
WestFax is proud to present FaxTools.
Requirements:
- Windows 7,8,10, Server
- Disk Space: At least 50mb t0 install tools/li>
- Fax To Email account. Need one? Get a fax number today. 10 day free trial!
(You may need your network admin to set this up if you are in a managed environment)
What is FaxTools?
AutoPrint: Anytime a fax comes in to your fax line it will print the fax automatically to a selected printer.
FaxDrive: Automatically download all incoming faxes to a local or network drive. We also have a secondary backup location to ensure you have redundancy.
Here is how to set this tool up:
- You may need you IT administrator to install this. Please coordinate with your IT team before using this tool.
- Download the FaxTools application and save it to your computer.
- Unzip the files to any directory and click setup.exe to start the installer.
- Choose a location to install the faxtools. Make sure you have at least 5omb of space available.
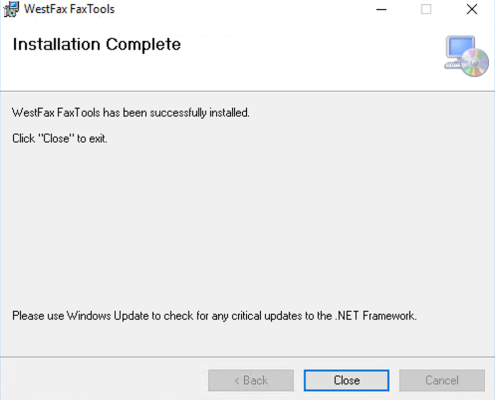
- After setup completes the application will launch.
- You might get a Windows Defender Alert. Please proceed anyway. Consult your IT admin if you aren't sure.
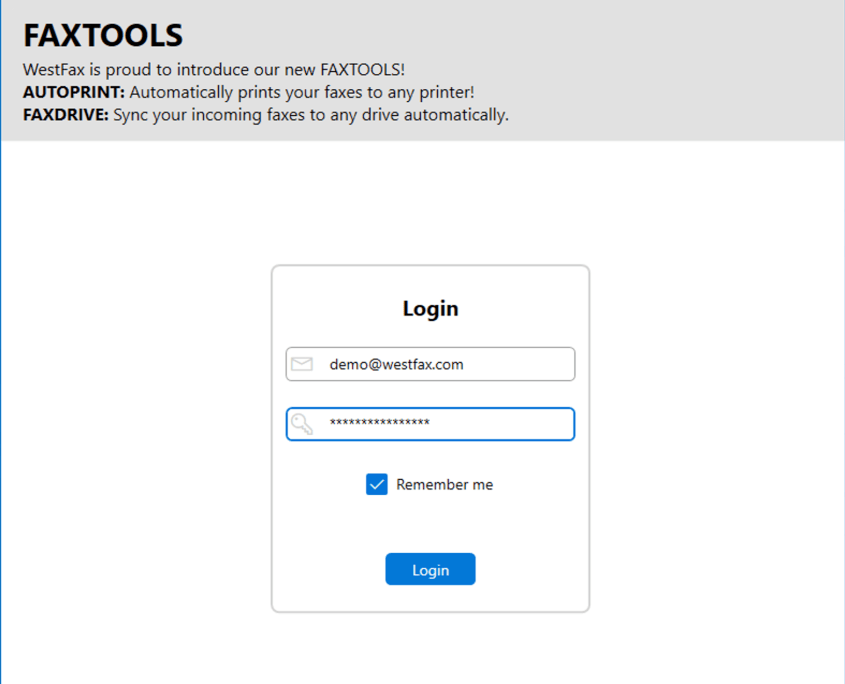
This is the home screen. You will be prompted to login using your WestFax Fax to Email credentials. If you have forgotten them click here to reset them.
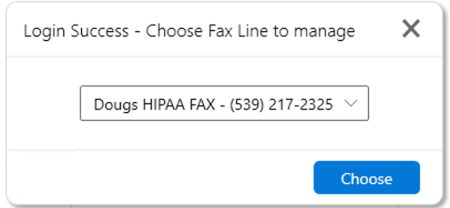
After logging in you will see a popup that asks you to select the fax line you want to manage. If you only have one fax line just click continue. Otherwise, if you have more than one pick the line you want to start with. You can toggle fax lines anytime inside the application.
Now you are shown the landing page. This is where you will configure your AutoPrint and FaxDrive. Let’s start first with the AutoPrint. The first thing you need to have is a printer available on your computer. It can be a network printer or a local printer but you must have at least one printer installed.
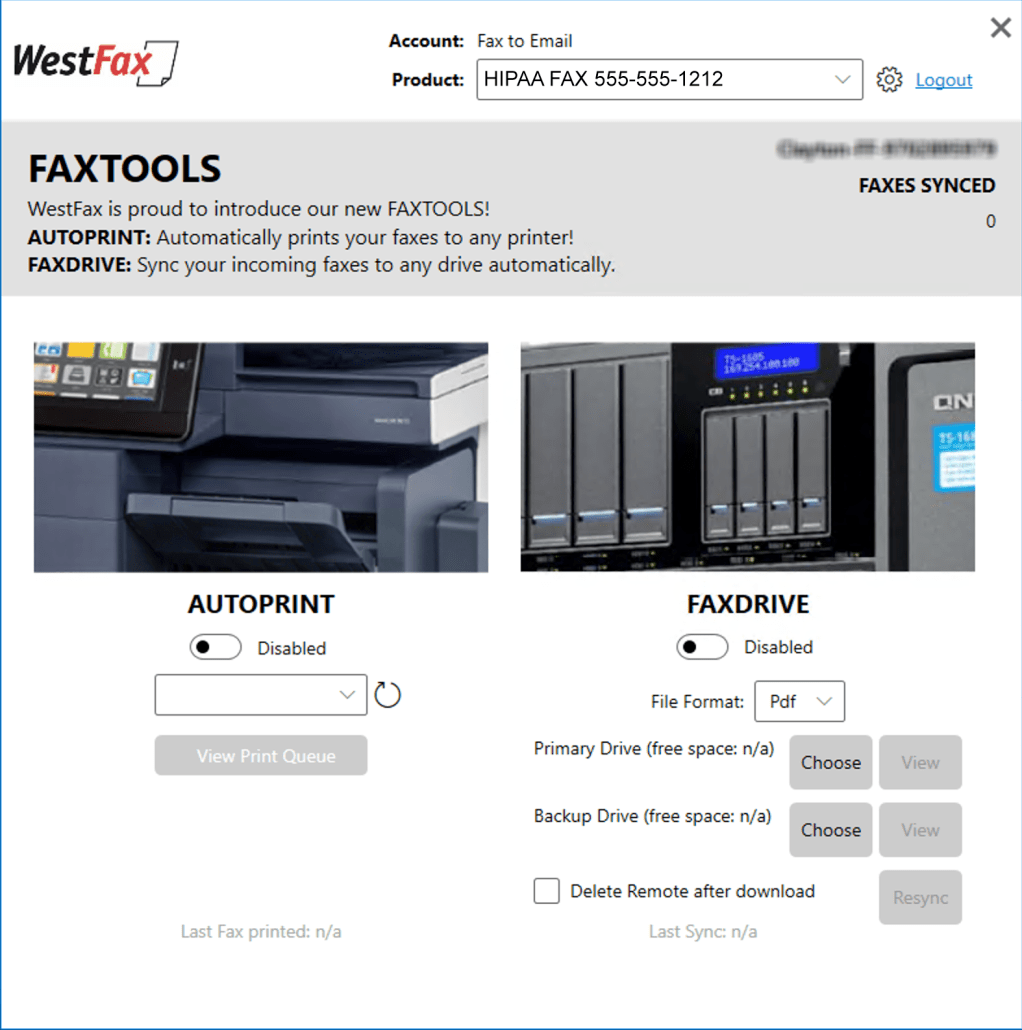
Just select the printer you want to automatically print faxes and click the Enable button. That’s it! You are done! Any fax coming in after you click enable will be printed automatically. Want to check on your printer status? Just click “View Print Queue” and you can see what’s in the queue. Sometimes print jobs may be stuck because of paper jam or no paper. This is where you can see what’s printing.

Let’s setup the FaxDrive now. The first thing to select is the File Format. PDF or TIFF. If you aren’t sure just choose PDF. Next, choose a primary location for the faxes to be saved. Make sure you have plenty of space if you have a lot of faxes. Most faxes average 20-150kb in size but it really depends on how many pages you are receiving. You can also select a secondary location in case you need to have a redundant file store. This ensures your faxes are secure in case your computer crashes and you need a backup location. You don’t have to set a secondary location but we offer it just in case.
Once you have the location set click the Enable Toggle. The faxes will start downloading in the background automatically. You can click the “View” button to see the folder and watch them download.
You can also click a checkbox that says “Delete Remote after download”. This is for customers that do not want faxes to remain on the fax server for HIPAA reasons or security reasons. This option will mark a fax as deleted and as soon as it downloads it will be removed. Caution: If you select this option faxes will be removed from the inbox on your home.westfax.com portal.
The last option “Resync” is useful if you need to start the sync process over because you changed the backup location.
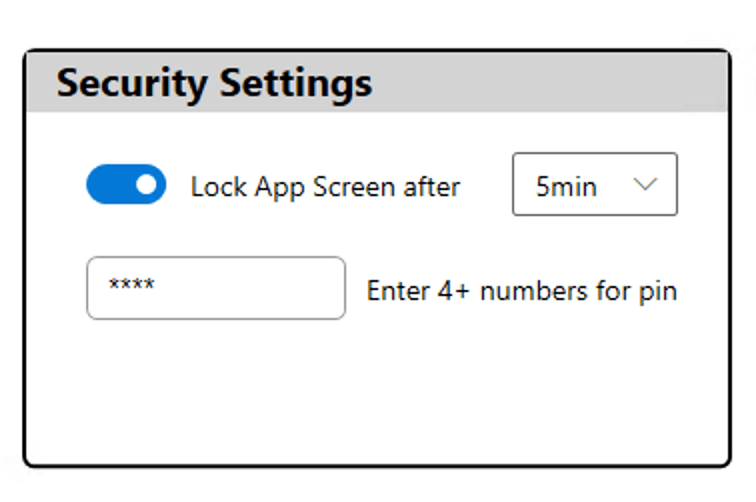
Let’s talk about the settings page. We offer the ability to set a lockscreen. This prevents anyone from viewing your fax settings unintentionally. Just click the Gear Icon on the top right. Then you can choose to enable the Lock screen by clicking “Lock App screen after” and then choose how long you want to wait before the lock screen kicks in. Then set a pin code (numeric only).
You’ll see the lock screen after the set timeout and it will prompt you to enter your pin to unlock the interface.
That’s it! You are setup. If you close the window it will still be in your tray. Just click it and it will relaunch the control panel.
If that’s all you need to do you are good.
Advanced users read on:
If you have multiple fax numbers you can select additional fax lines under the product drop down. This will allow you to setup AutoPrint and FaxDrive for several fax lines at the same time so you can manage multiple fax lines independently.
Just toggle the fax lines to change or verify settings.
HIPAA Compliance and FaxDrive
Extra care must be taken when handling PHI. We’ve talked about Fax and HIPAA compliance before and it’s important that your organization takes HIPAA guidelines into account. If you are printing faxes using AutoPrint that contain PHI then be sure the printer is in a secure location where the public doesn’t have access. Think of your printer as a physical fax machine and treat it accordingly.
With FaxDrive you should be sure that the fax documents are being saved in a location that is secure, encrypted and not available to anyone who shouldn’t have access to PHI. Saving files to network shares is fine as long as your network is secure and proper permissions are in place.