In this how-to we are going to talk about different implementations of callbacks and different ways to handle inbound faxes and notifications. This article assumes you hare familiar with the basics of the WestFax API. Here is a refresher article.
What are callbacks? They are asynchronous, out-of-band requests that your service will send to some other service in response to certain events. This helps you improve the workflow your app.
In layman’s term a callback is just that. Something happens (You send a fax) and we “call” you back and tell you that it sent. A callback for an incoming fax works the same way. We get a fax for you and we let you know it. The mechanism is for our server to “call” or load a URL that is specified by you. When we call your script or webpage you can configure your app to do whatever it needs to do.
You set the callback url which is a page on your website that can process data about an event. Your page is configured to receive parameters using POST or GET Method. WestFax supports both. When an event occurs (Successful fax delivery, etc…) it will call that url with the proper parameters so your application can handle the event and process your workflow without having to intermittently ping our service.
- Send a fax using the API to ourselves or a test fax number.
- Get the callback response and call a web service that gives us the status of the fax
- We will assume you are using a relatively modern development framework. PHP, React, .Net, etc…
- We recommend you use a tool like Postman (Free and available on all platforms) to test your API’s and generate the code.
- Developer API account. Easy to sign up and get started immediately.
The WestFax API is comprised of a large set of methods that are exposed using a RESTful interface. Data can be interchanged in a number of formats including JSON and XML. Additionally, WestFax offers SOAP and RPC bindings that are described elsewhere. For the purposes of this demo the REST interface with JSON encoding is used.
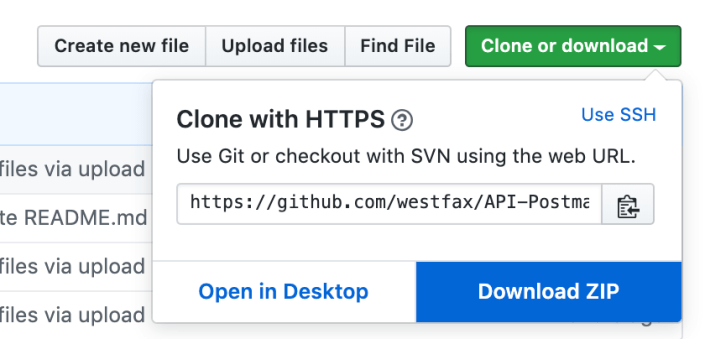
- Get the sample code for Postman. Link here.
Click Download or Fork it to your local repo.
Once you have the local files you should see two Json Files: WestFaxApi_Postman_collection.json and WestFaxApiEnvironment.postman_environment.json
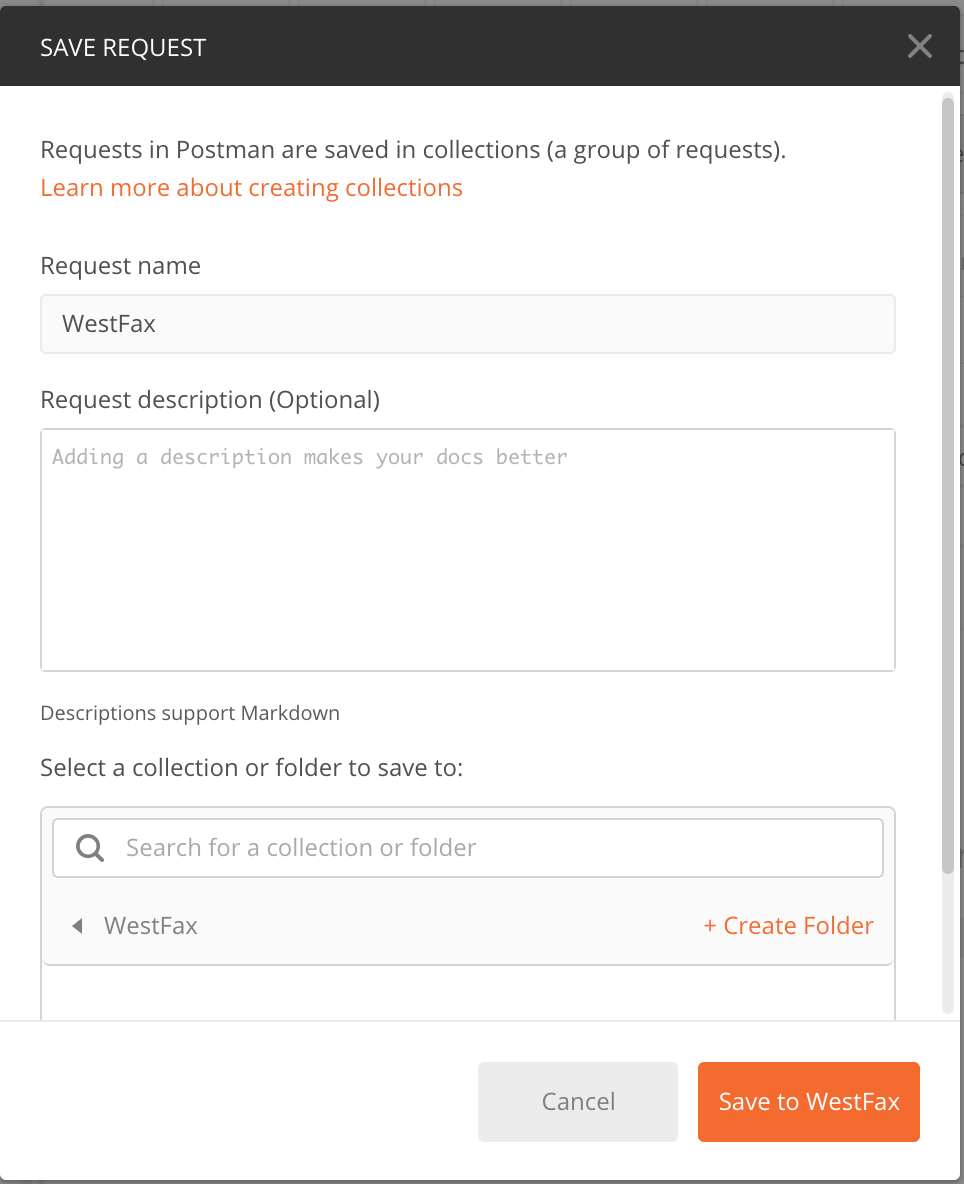
Open Postman and create a new Request. You can call it whatever you want to call it but we will use WestFax.
Now go click the File -> Import command.
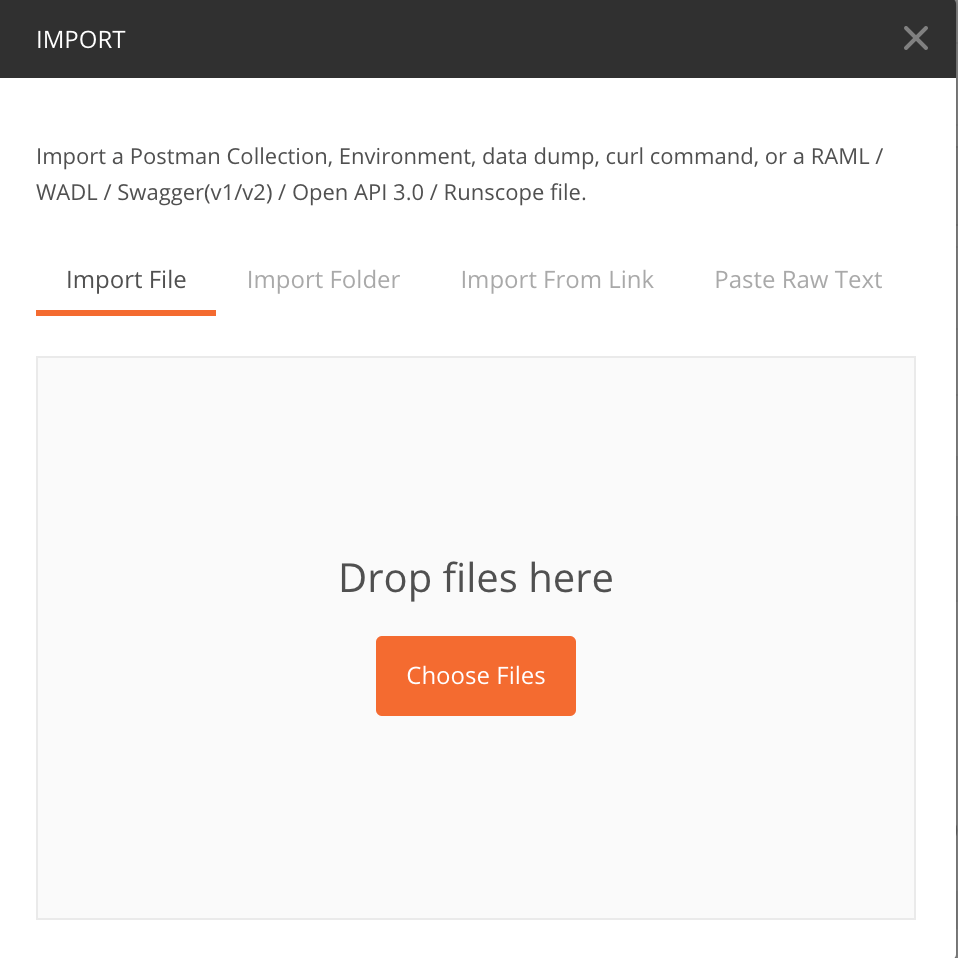
Drag or select the two Json Files from the code you downloaded earlier and click import.
You will see it quickly import and you will have 23 requests in your new WestFax Collection.

Now look at the top right corner of postman. You should see a drop down and an “eye” icon and a gear icon.
Select the Dropdown to select “WestFaxApiEnvironment” and then click the Eye icon.
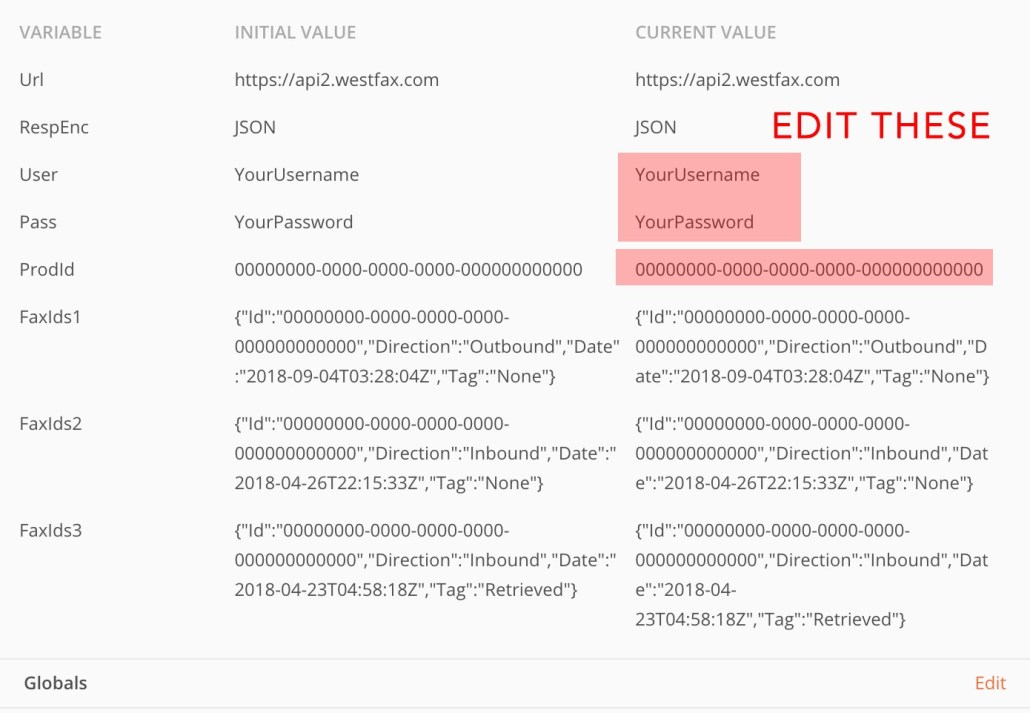
You will now see a bunch of pre-defined variables. You will want to change these by clicking Edit.
Change the default values to the ones you received when you signed up for API access.
Now let’s go test to make sure we are connecting ok and getting a response from the server. On the left menu under “23 requests” select the “Security_Ping”. Go ahead and click the blue “SEND” button.

You should see something like this come back from the API. If not please feel free to contact us for support.

Now let’s try to send a fax. If you have an incoming number attached to your account you can use that or any other fax number. You can also use the well known HP Faxback test number at 1-888-473-2963. They will fax you back that they received your fax usually within 5 minutes.
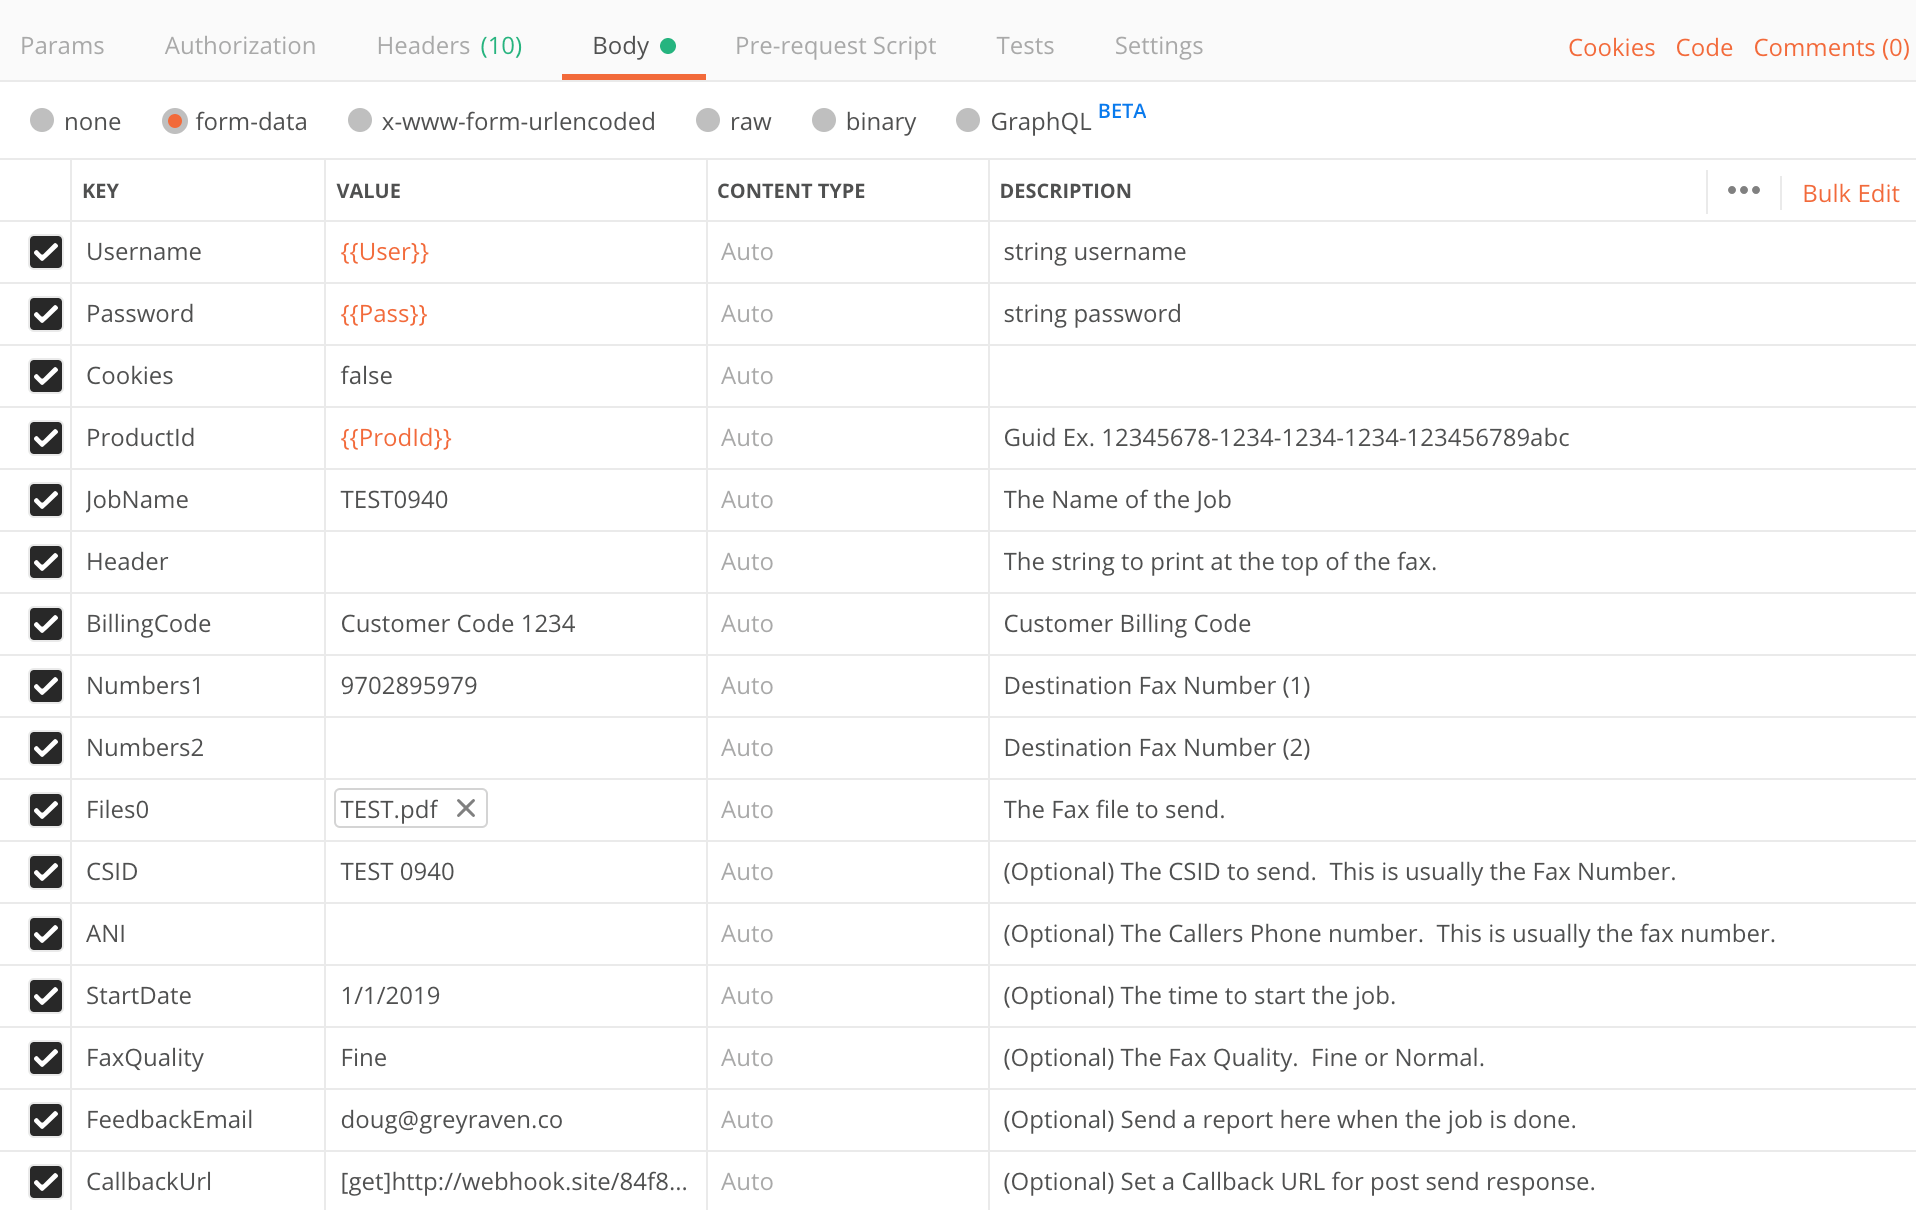
So click the Fax_SendFax method on the left and you will see this for your Body setup.
The {{ Orange }} values are filled in from the config you already set so you can ignore those. The values you need to set are the Numbers1, Files0 fields. The rest are optional and you can unclick them if you want. Although adding a FeedbackEmail value is useful to get confirmation of the fax sending. Once you set all these variables go ahead and click send.
(Optional: Callback). Set your CallbackUrl with templated values for replacement. In this case we are using: [get]http://yourweburl.com/{@jobid}?prod={@prodid}&dir={@dir}. WestFax will replace the @jobid, @prodid and @dir with real values so one can process accordingly. GET is implied so you can exclude [get] from the beginning or use [post] to use that method.
You should see a result code of True and a hash string with the confirmation code. This Result code is the @jobid you will use in the next phase of handling the callback so copy this value somewhere.
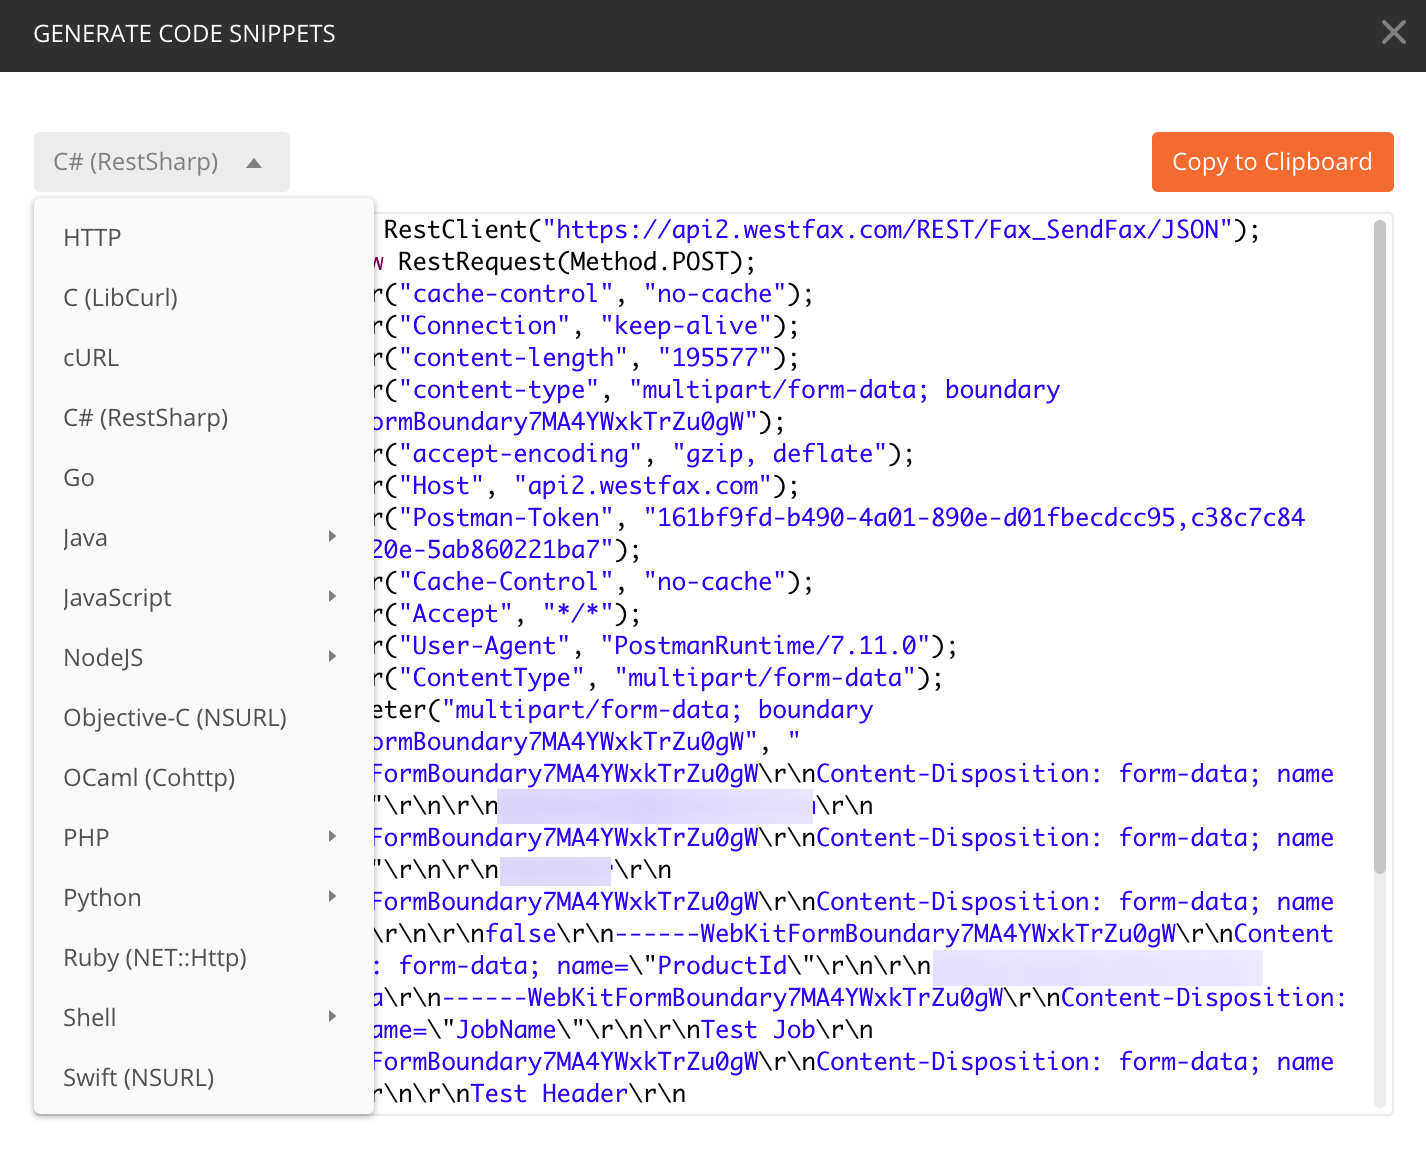
Ok, so here is a neat trick that Postman give us. You can get all your code done for you. Just click the button “Code”. It’s kind of buried near the Send button next to cookies.
Now when you click code you will get formatted code for almost any programming language you may need:
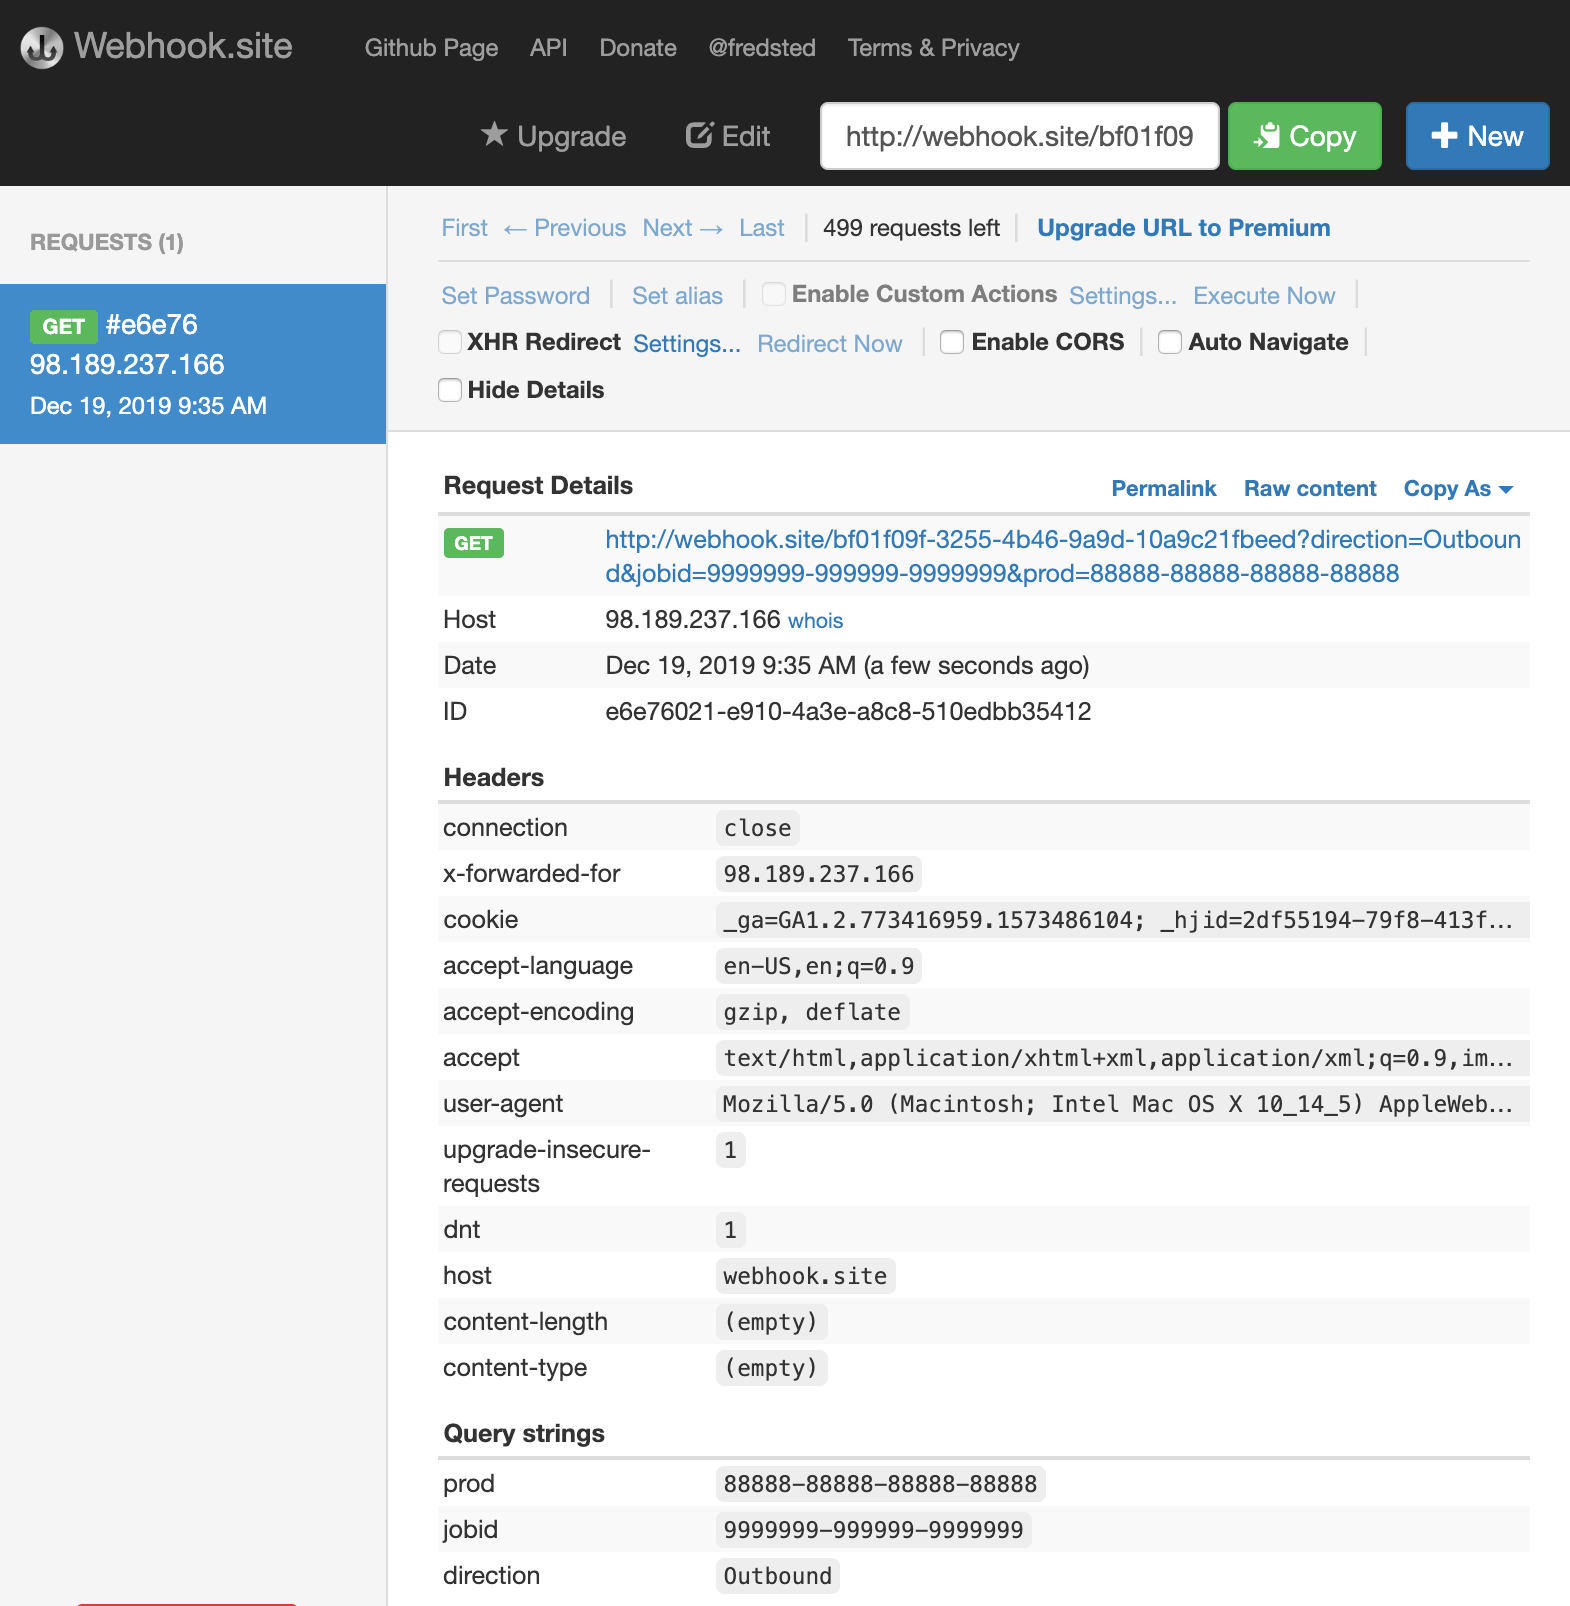
So the fax process worked and we are waiting for a callback response. Basically WestFax will ping a url that you provide.
In our case we used a website called Webhook.site. Here is the result of the Callback call:
So when the callback fires your webpage should handle those input values.
Once you have the values you can call the next webservice and get the data back. Let’s get started.
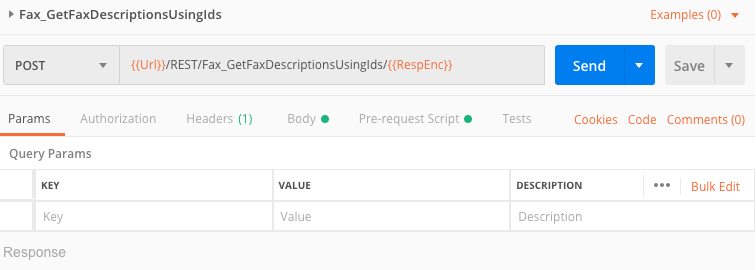
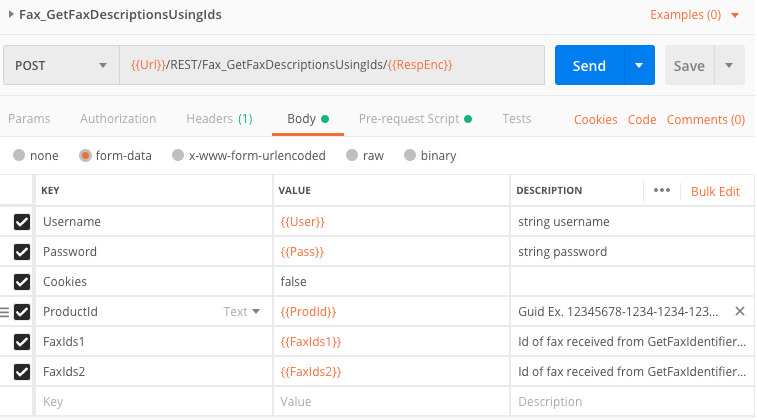
Let’s go back to Postman and find the webservice called Fax_GetFaxDescriptionsUsingIds. Go ahead and click it. You’ll see something like this:
Ok, so let’s look at the Body of this request so we know what we need to fill out to get the fax status.
We see that it has the username, password, cookies (we can ignore that), productID and two new fields FaxIds1 and FaxIds2. You’ll notice that these fields have template string placeholders of {{FaxIds1}} and {{FaxIds2}}. This is because these values are serialized and we’ll look at this next. The FaxIds fields are the Faxes we want to get the status of. We have the result code from the previous call so let’s go explore that.
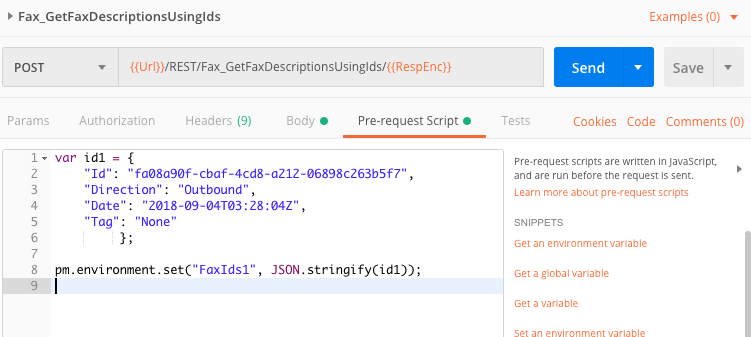
We are going to click on the Pre-request Script header and we’ll see the format of the template placeholder we talked about previously.
So we already put this code in there for you. All you need to do is replace the Id field. The Direction, Date and Tag are optional as the ID is the key field here. So we’ll put our Id in here and you can see on Line 8 that we bind the JSON string to the Variable. You could also copy all the JSON from the variable id1 into the FaxIds1 field directly but this template allows you to append more Id’s and get the status of several faxes.
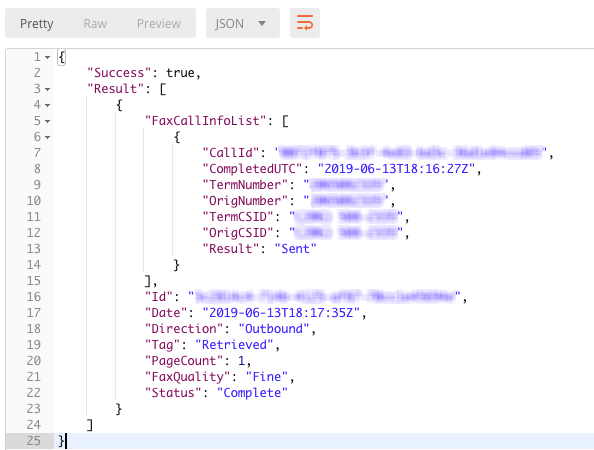
Once you have the ID in there you will hit Send and get the following output.
You can see here that we have a complete record of the fax transmission. You can parse the JSON result in whatever method you choose and you can see that we have the Date, Direction, PageCount, Quality and Status which is Complete. So the fax is completed.
Success! As you can see it’s not hard at all to add Faxing to your Enterprise application. If you have questions or need more help please reach out to us at 800-473-6208 or contact us via email.