
 Login
Login
How to Set Up WestFax Single Sign-On with OneLogin
Build a SAML Custom Connector app in OneLogin so your team reaches the WestFax fax console from the OneLogin portal without a second password.

WestFax supports SAML 2.0 single sign-on with OneLogin, so your team reaches the WestFax fax console from their OneLogin portal with credentials they already have — no separate WestFax password to issue or reset. Setup is a three-step round trip: turn SSO on with your WestFax account manager and copy three endpoints off the SSO tab, build a SAML Custom Connector app in OneLogin and copy an endpoint plus a certificate back, then paste those into the WestFax admin panel and save. From then on, access is managed exactly like any other OneLogin application.
What you’ll need
- A OneLogin organization account with at least one user, and admin access to your OneLogin portal
- A WestFax Enterprise account with SSO enabled — see step 1 if it isn’t on yet
What you get once it’s running: control from OneLogin over who can reach the WestFax platform, automatic sign-in for your users, and one central place to manage the accounts.
Step 1: Turn on SSO and copy your WestFax endpoints
SSO is not on by default. Before any of the identity-provider work below will do anything, your WestFax account has to be provisioned for it — contact your account manager and ask them to activate SSO. There may be a setup fee, and they will walk you through provisioning.
Once SSO is active on the account, sign in to the WestFax admin tool and open the SSO tab. You should see a screen like this:
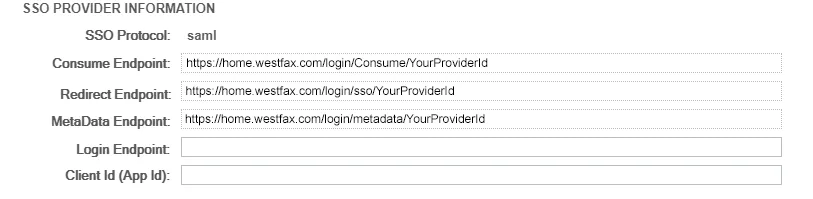
The SSO tab shows three values generated for your account. Copy all three somewhere safe — every one of them gets pasted into your identity provider in the next step. YourProviderId is unique to your WestFax account; the tab shows the real value.
- Consume Endpoint —
https://home.westfax.com/login/Consume/YourProviderId. This is the SAML assertion consumer service (ACS) URL, where your identity provider posts the signed assertion. - Redirect Endpoint —
https://home.westfax.com/login/sso/YourProviderId. This is the link your users click to sign in, and the start URL for service-provider-initiated login. - Metadata Endpoint —
https://home.westfax.com/login/metadata/YourProviderId. This is the SAML entity ID that identifies WestFax as the service provider.
Copy these straight off the SSO tab rather than typing them by hand. A single wrong character in the Consume Endpoint is the most common reason a first SSO attempt fails.
Step 2: Build the WestFax connector in OneLogin
Sign in to your OneLogin admin portal. WestFax isn’t a catalog app, so you’ll start from OneLogin’s generic SAML connector and fill in the WestFax values yourself.
- Go to Applications → Applications and click Add App in the top right.
- Search for
SAML Custom Connectorand choose the one labelledSAML Custom Connector (Advanced), authored by OneLogin. That connector is the starting template for a SAML connection to WestFax.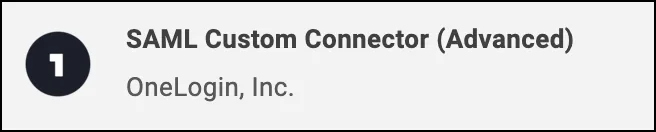
- Name the app and save. Enter
WestFaxfor the display name and, if you want the tile to look right, use the WestFax logo. Click Save — that creates the application and unlocks the configuration tabs used in the next steps.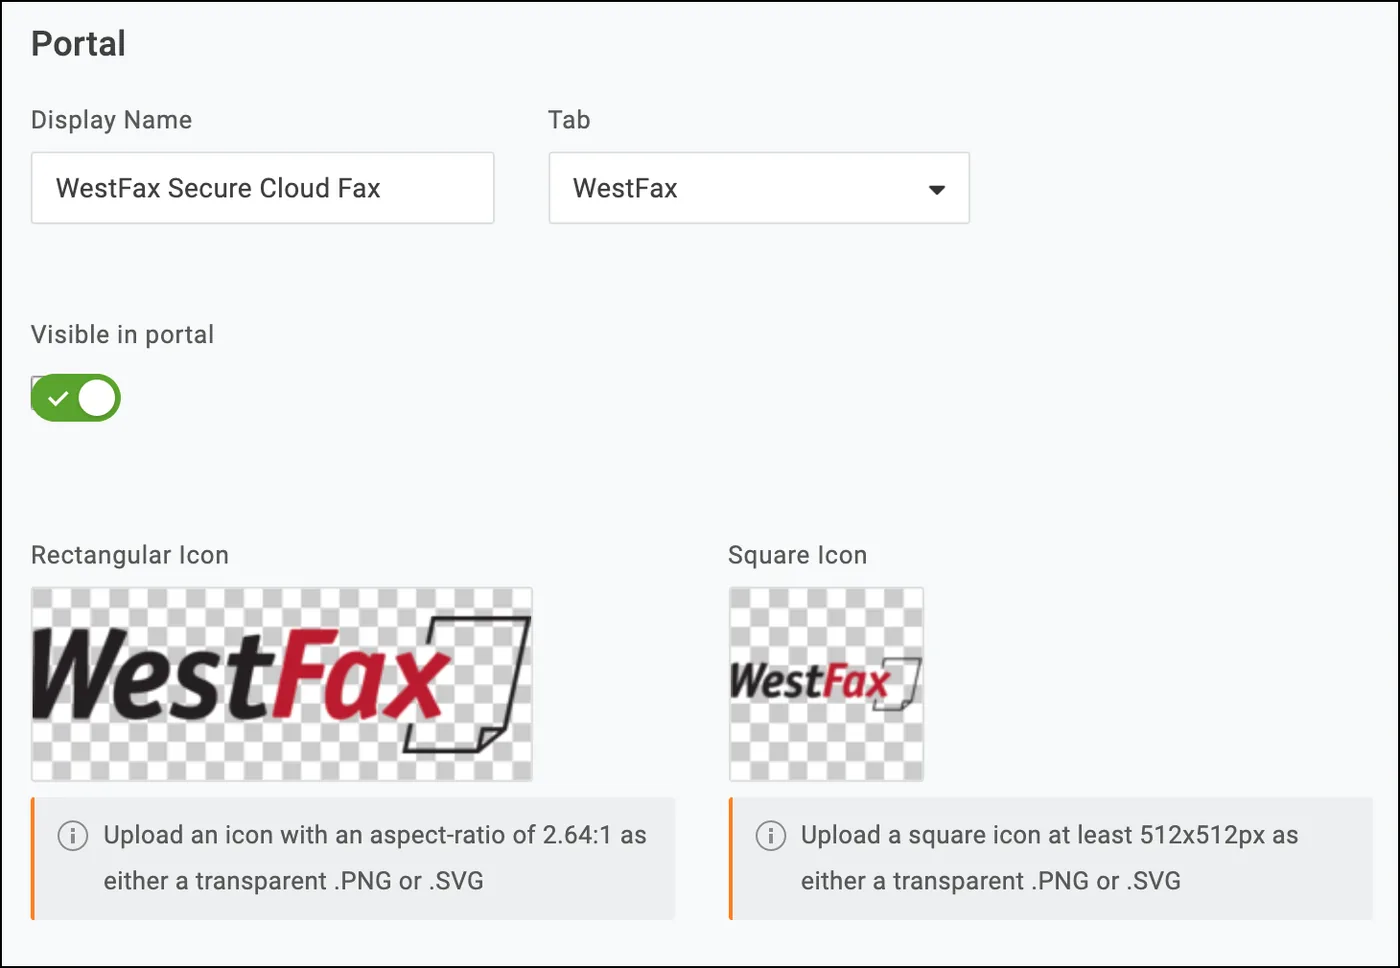
- Open Configuration in the left menu and enter the endpoints you copied in step 1.
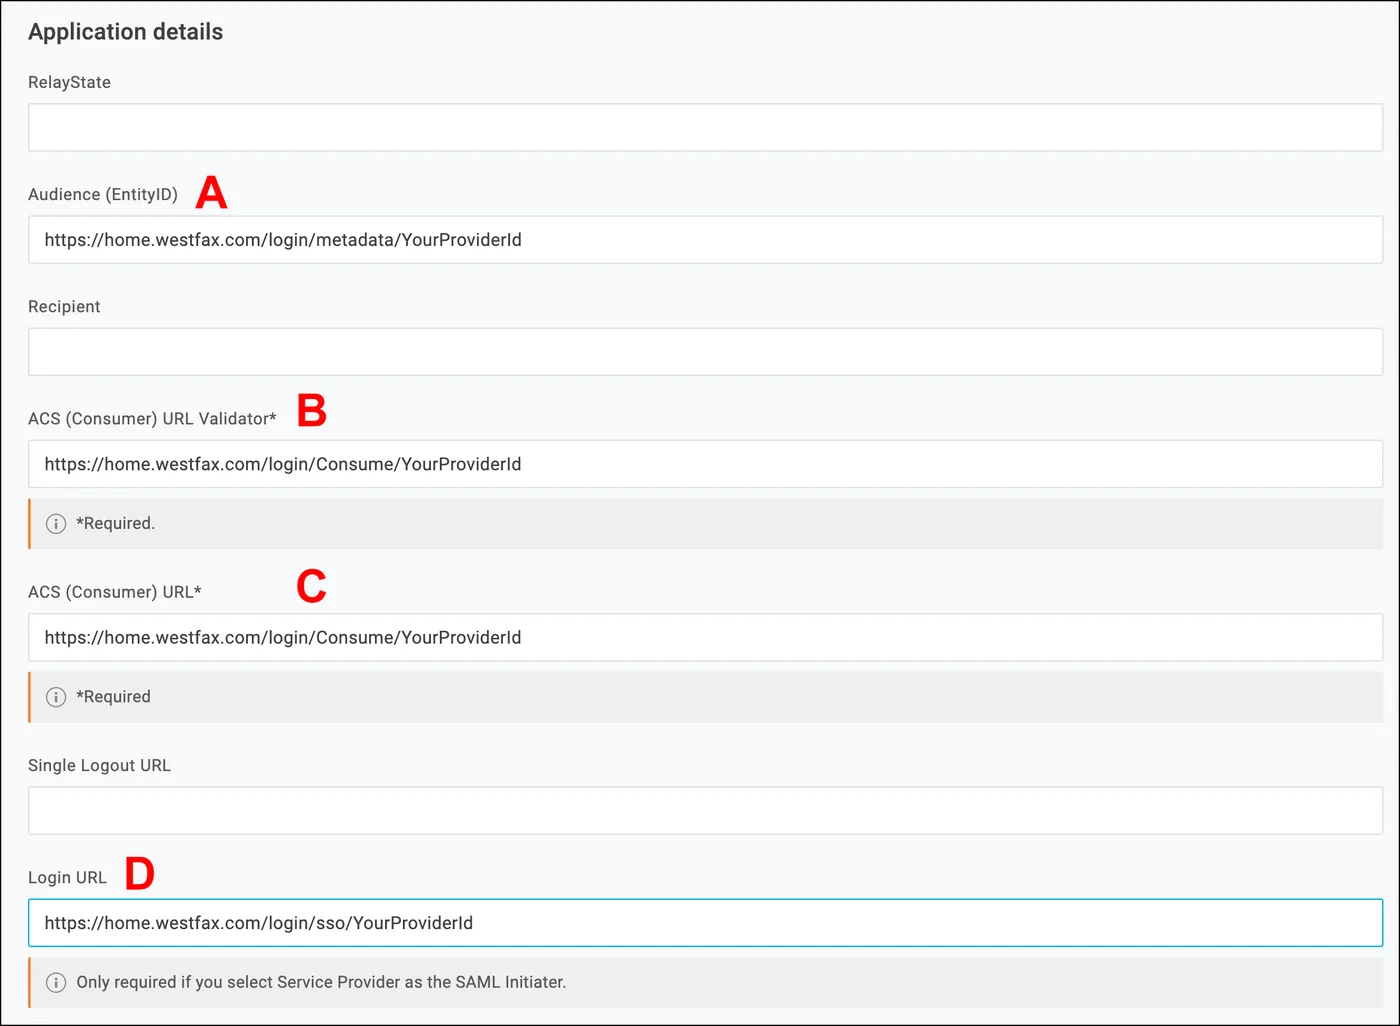
- A — Audience (Entity ID):
https://home.westfax.com/login/metadata/YourProviderId - B — ACS (Consumer) URL Validator:
https://home.westfax.com/login/Consume/YourProviderId - C — ACS (Consumer) URL:
https://home.westfax.com/login/Consume/YourProviderId - D — Login URL:
https://home.westfax.com/login/sso/YourProviderId
Scroll further down the same tab and set the name ID format:
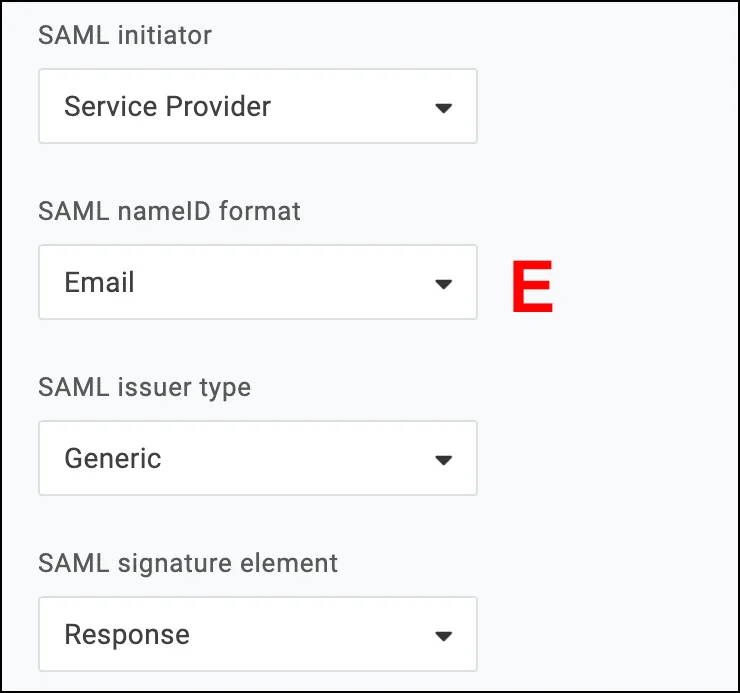
- E — SAML nameID format:
Email
Other values can be used here, but Email is the WestFax default. Ask us if your directory keys on something else.
- A — Audience (Entity ID):
- Open SSO in the left menu and copy the
SAML 2.0 Endpoint (HTTP). Save it — step 3 needs both the full URL and a fragment of it.
- Click View Details under the X.509 Certificate box and download the certificate to a secure location.
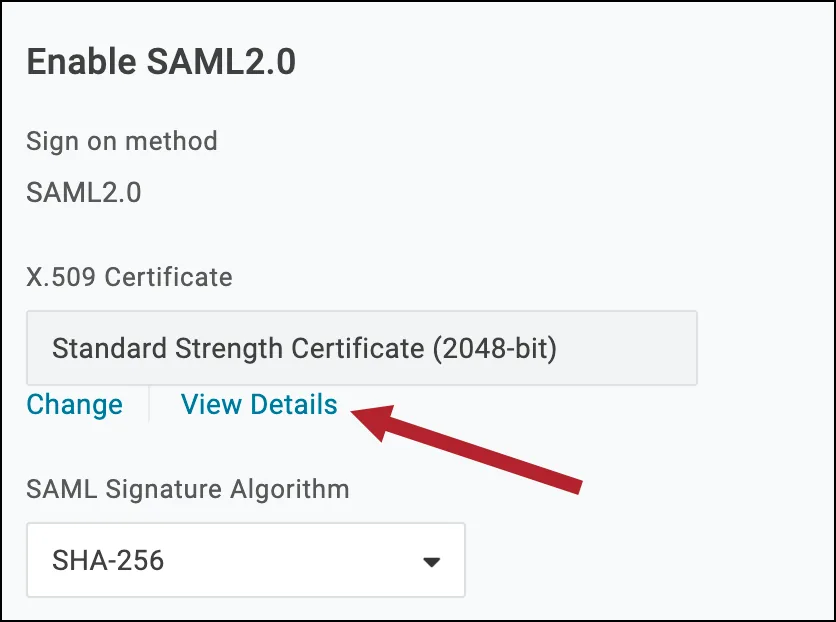
- Click Save. The OneLogin side is done. Grant access to the WestFax app the same way you would for any other OneLogin application.

Step 3: Finish the setup in the WestFax admin panel
Go back to the WestFax admin panel and open the SSO section again. This is where the OneLogin endpoint and certificate get entered.
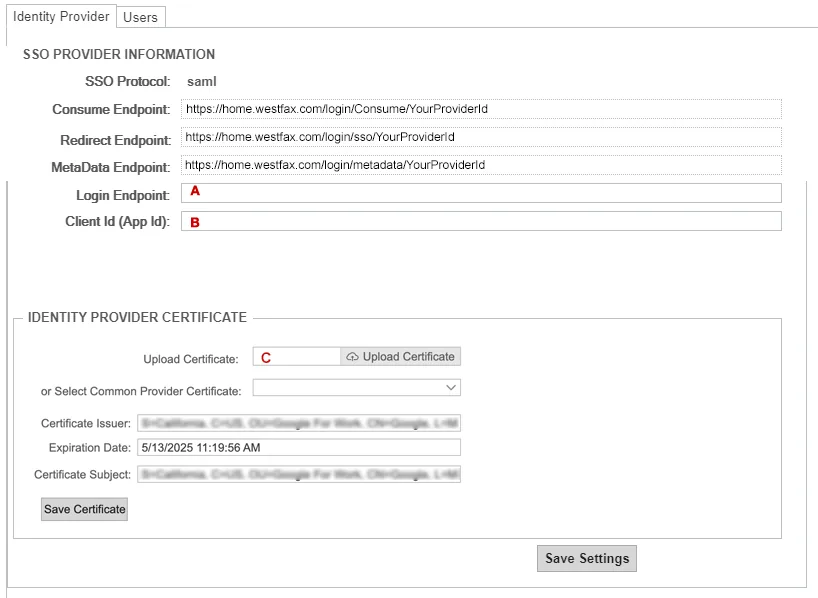
A — Login Endpoint— the fullSAML 2.0 Endpoint (HTTP)from OneLogin.B — Client Id (App Id)— taken from that same endpoint: copy the GUID that follows/http-post/sso/, and nothing else.C — Certificate x.509— the certificate you downloaded from OneLogin. Click upload and select it.
Click Save Settings. That completes the configuration.
Sign in with SSO
Your team signs in through the Redirect Endpoint from step 1 — https://home.westfax.com/login/sso/YourProviderId — rather than the standard WestFax login page. Copy the exact link off the SSO tab and distribute it, or let users launch WestFax from their OneLogin portal.
Troubleshooting
- Users can’t see the WestFax tile. They don’t have access to the app. Grant it in OneLogin the same way you would for any other application.
- Sign-in fails right after the OneLogin prompt. Check the ACS URL, the ACS URL Validator, and the Audience against the SSO tab character for character, including
YourProviderId. - WestFax rejects an authenticated user. The most common cause is the Client Id: it must be only the GUID after
/http-post/sso/, not the whole endpoint URL. After that, check the SAML nameID format isEmail. - Sign-in worked and then stopped. OneLogin certificates expire. Download the current one and re-upload it in the WestFax SSO panel.
Still stuck? Call us at 303-299-9329, contact our team, or reach out to your account manager.