
 Login
Login
How to Move from Twilio Fax API to WestFax API in 15 Minutes or Less
Twilio sunset its Programmable Fax API in December 2021. This guide shows you how to move your fax API integration from Twilio to WestFax and send your first fax via the WestFax HIPAA-compliant fax API in 15 minutes or less.

Why Migrate from Twilio Fax
If you were a Twilio customer using their fax API, you were likely notified that Twilio sunset its Programmable Fax API service in December 2021.
We want to make transitioning as painless as possible so we created this simple guide to get you up and running immediately.
This article makes certain assumptions. We assume you are a developer or engineer that has a basic understanding of RESTFul APIs and integrations.
Set Up Your Account in Postman
First, get a WestFax Account. Once you get your account you will have your username and password. We’ll use this to get your API key (ProductId).
Next, Load up the documentation in Postman (It’s free and a great development tool). Here is alink to our documentation. Just click “Run in Postman” in the top right corner.

The WestFax Collection will be displayed on the left-hand side:
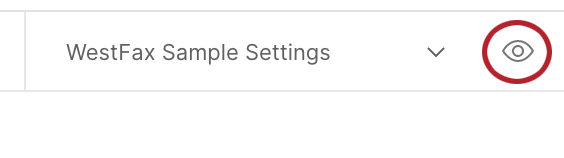
Make sure the environment variables are set. In the top right corner.
Click on the Eyeball and you should see some default settings.
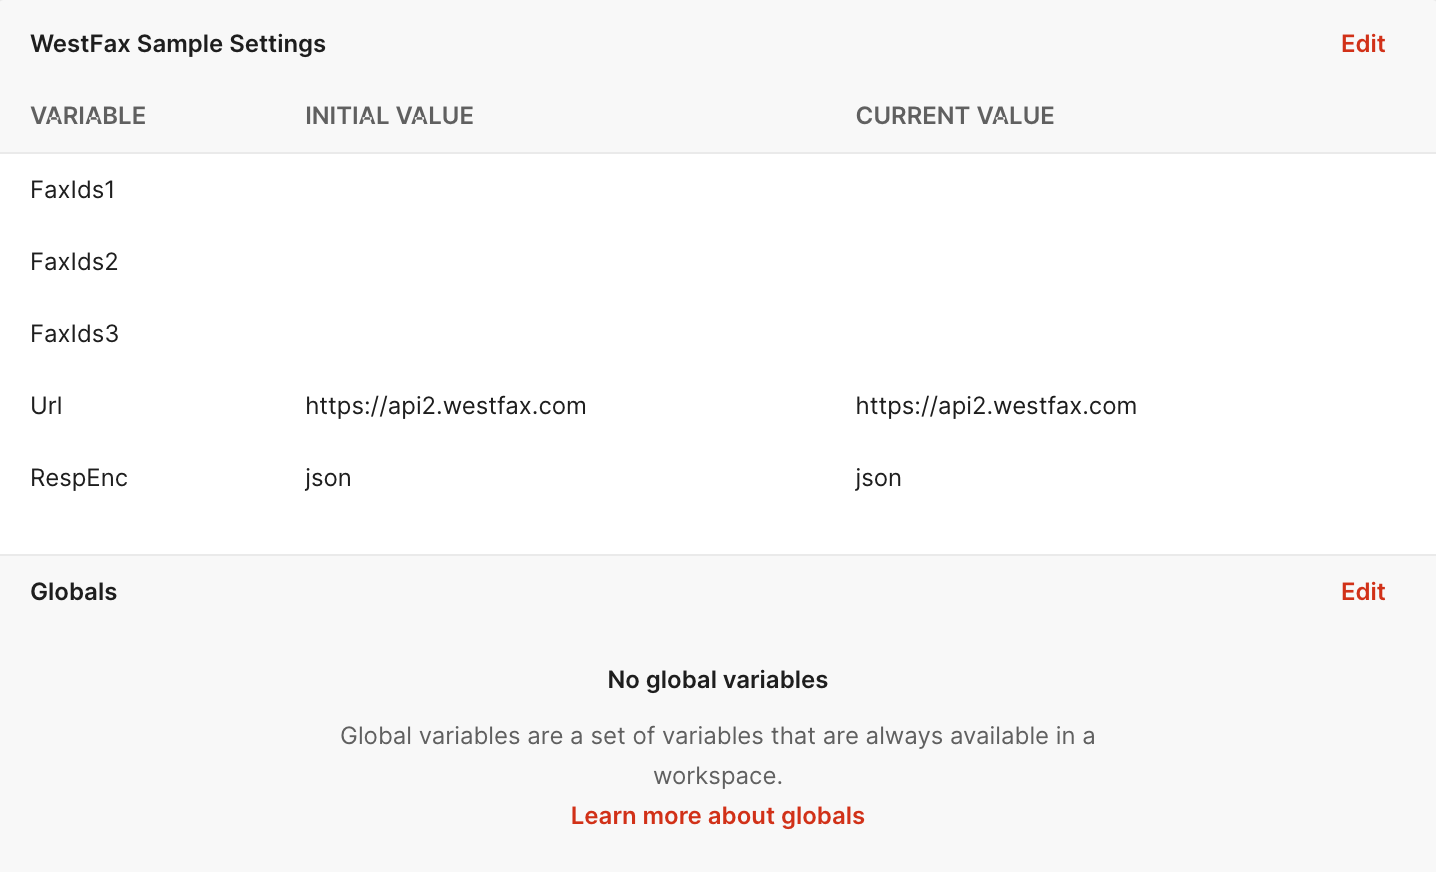
Click “Edit” in the top right corner. You can now add some settings here.
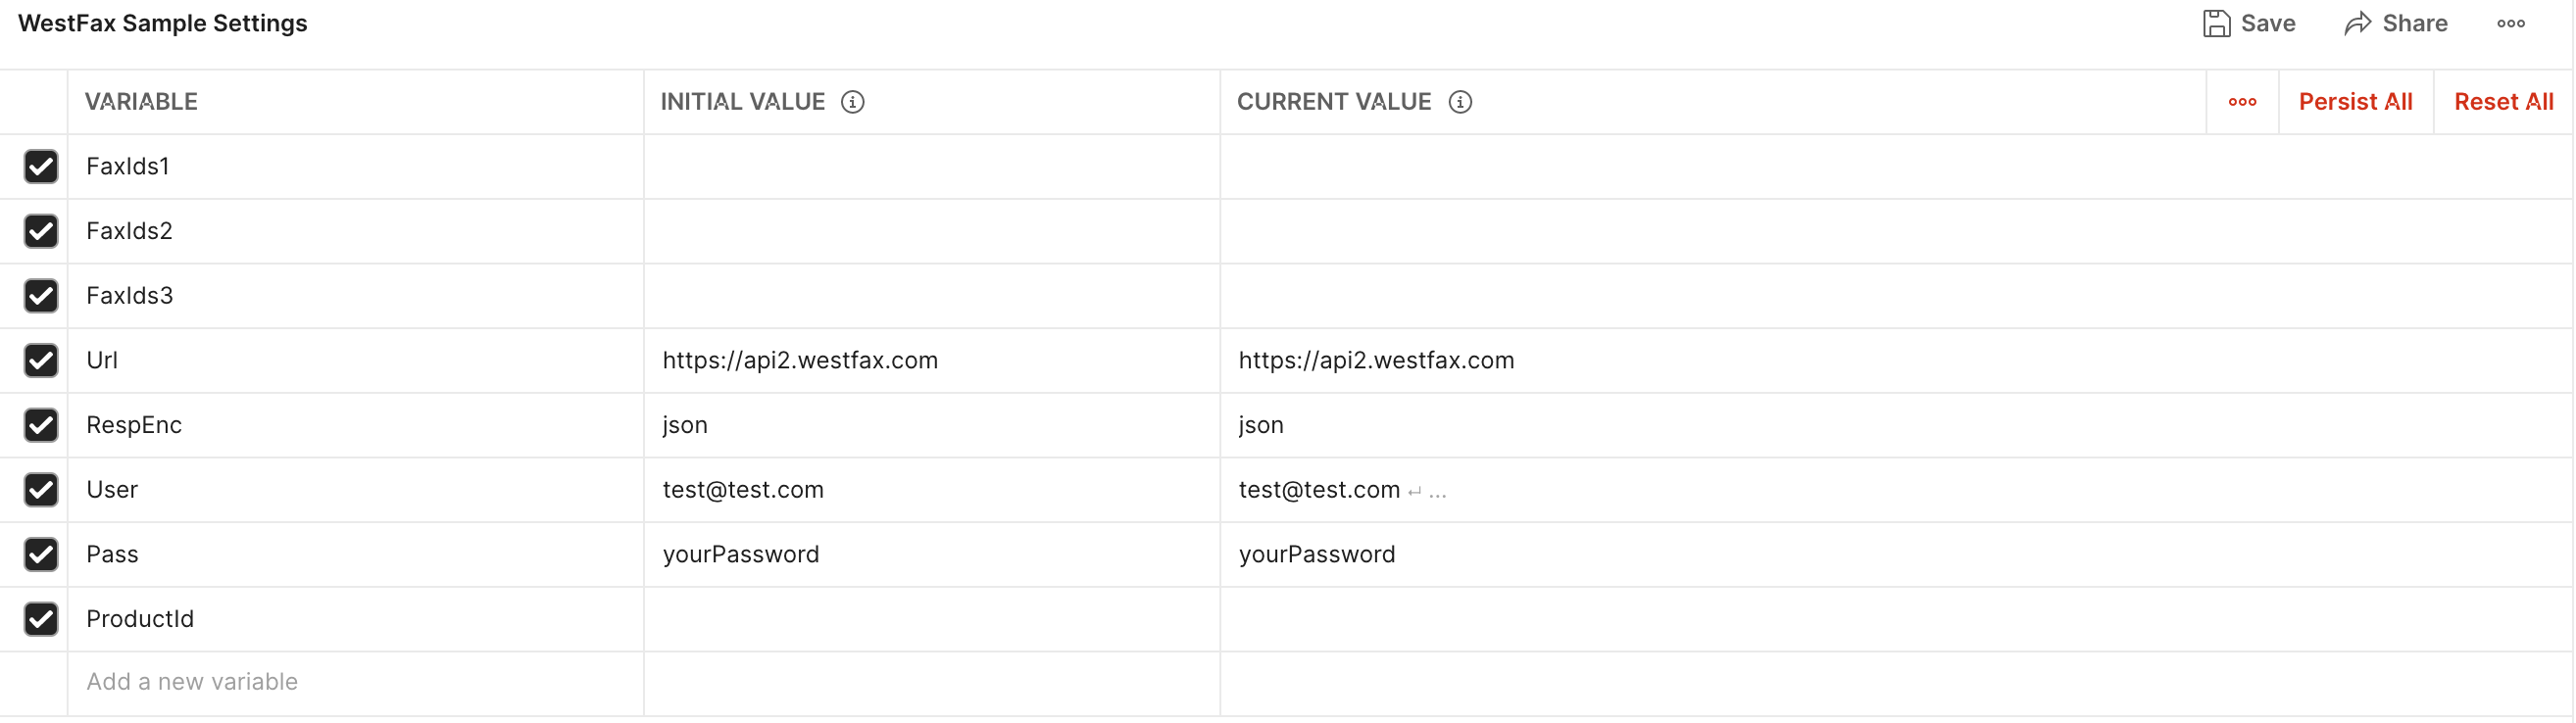
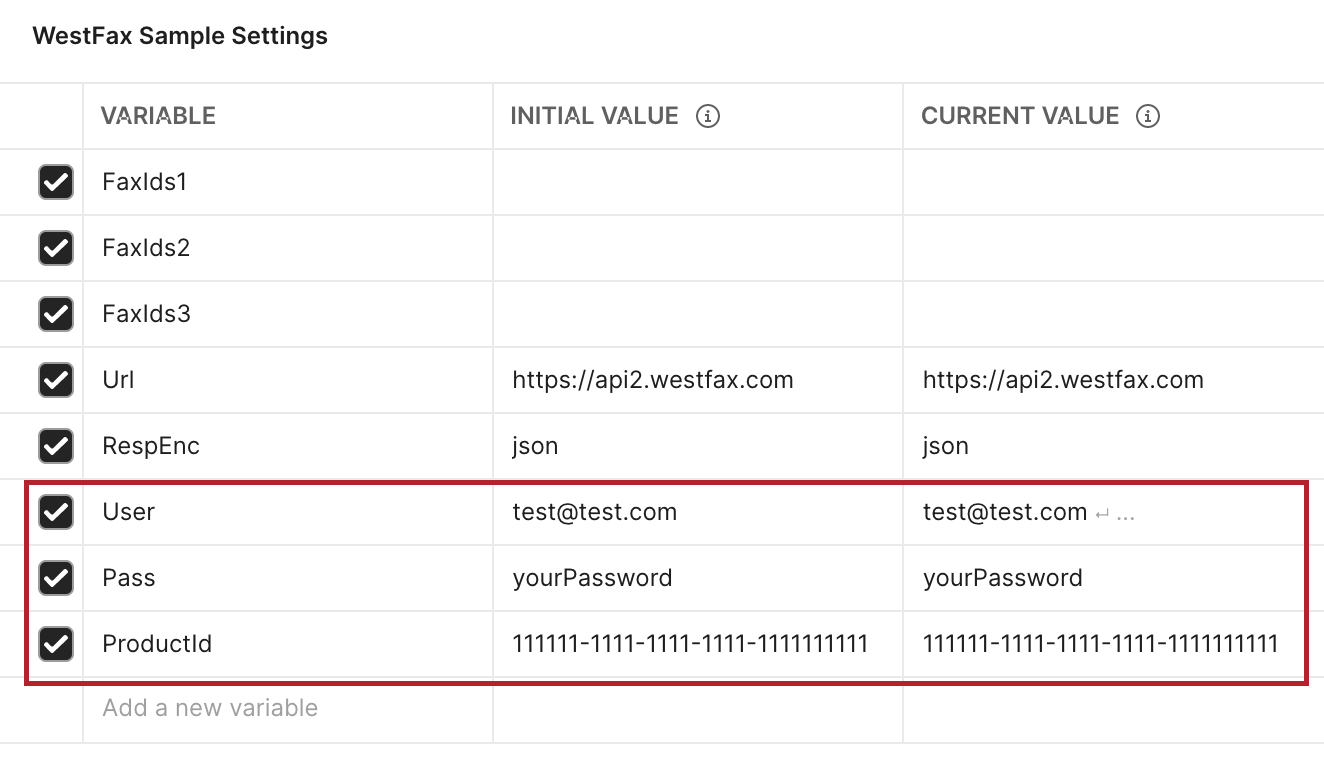
Set the User and Pass to the login and password you set when you created an account.
We’ll set the ProductId after we retrieve it from the API. Ok, The settings panel should look like this. Hit save in the top right corner.
Retrieve Your API Key (ProductId)
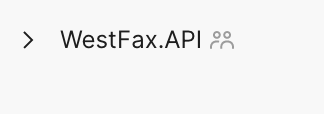
Ok, Now let’s go explore the API calls. Break down the list on the left under WestFax.API. It should look like this:
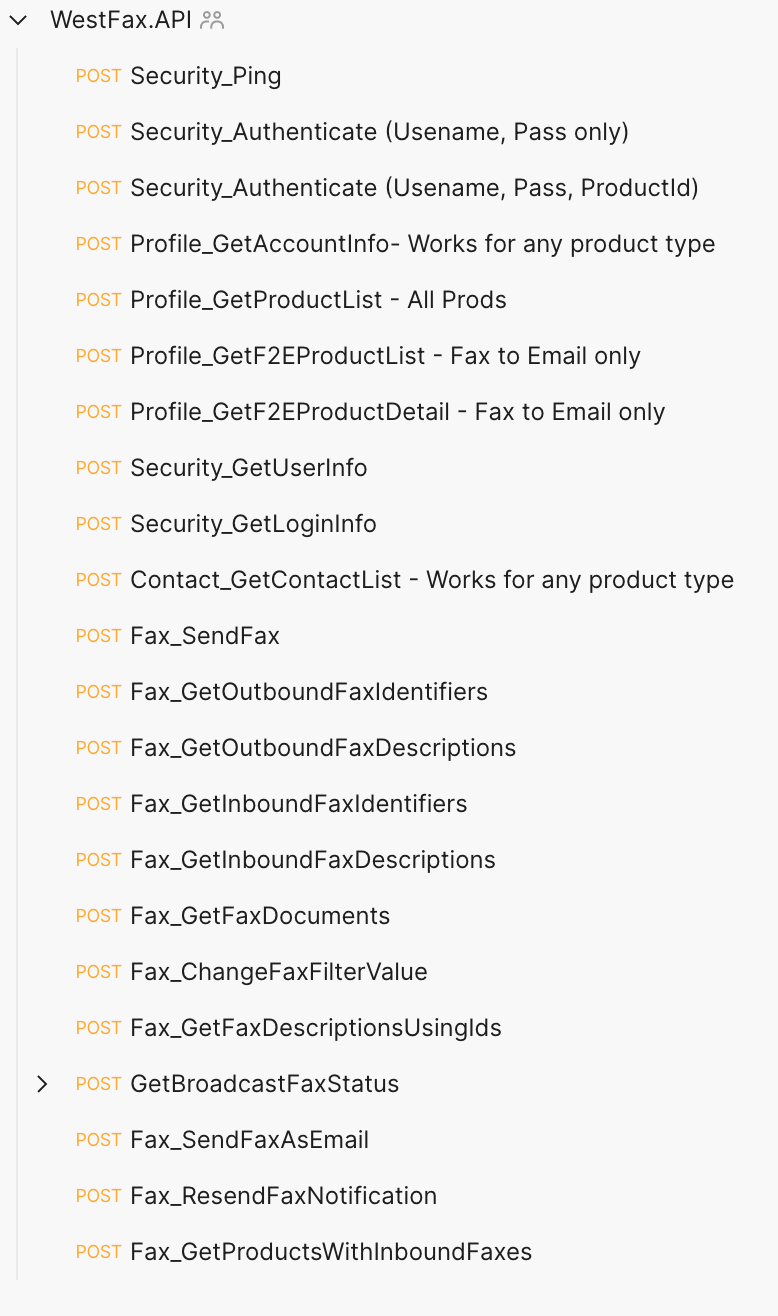
You want to doubleclick Profile_GetF2EProductList - Fax to Email only.
You should see the call open up in the main editor and it will look like this:
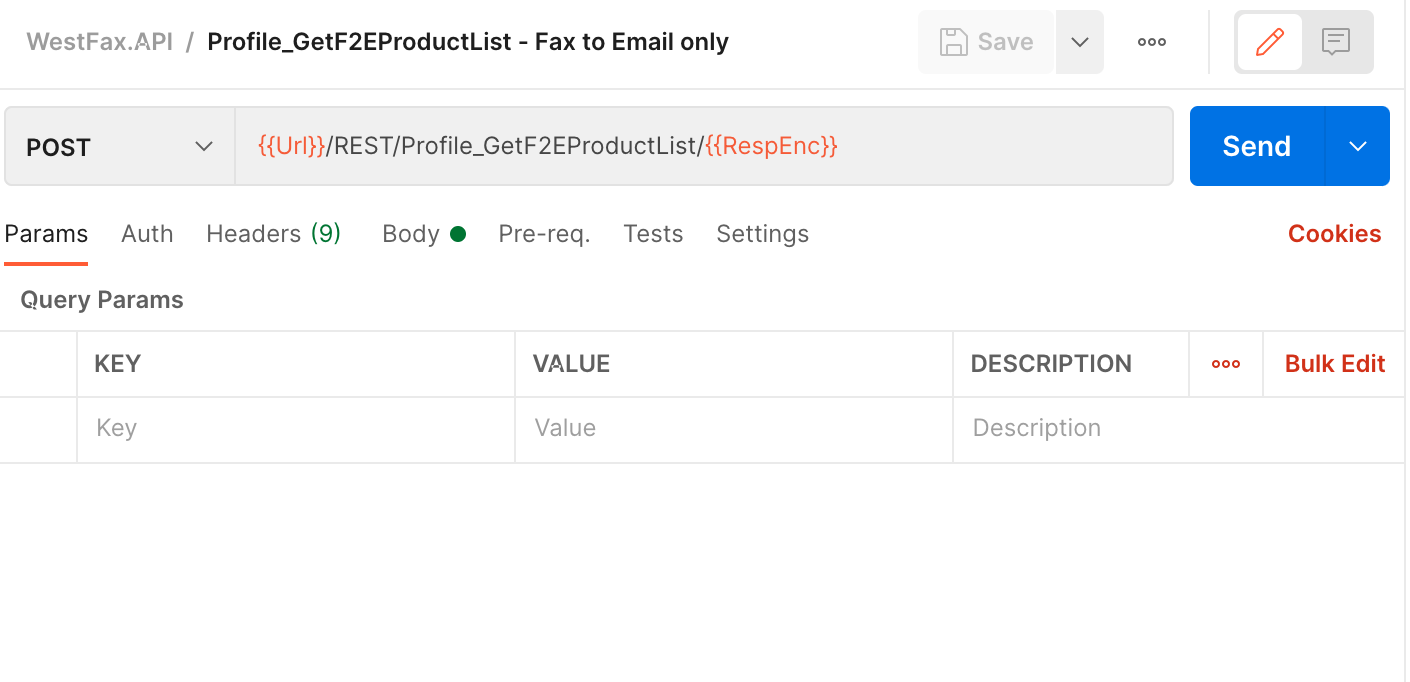
Click the Body text with the green dot next to it.
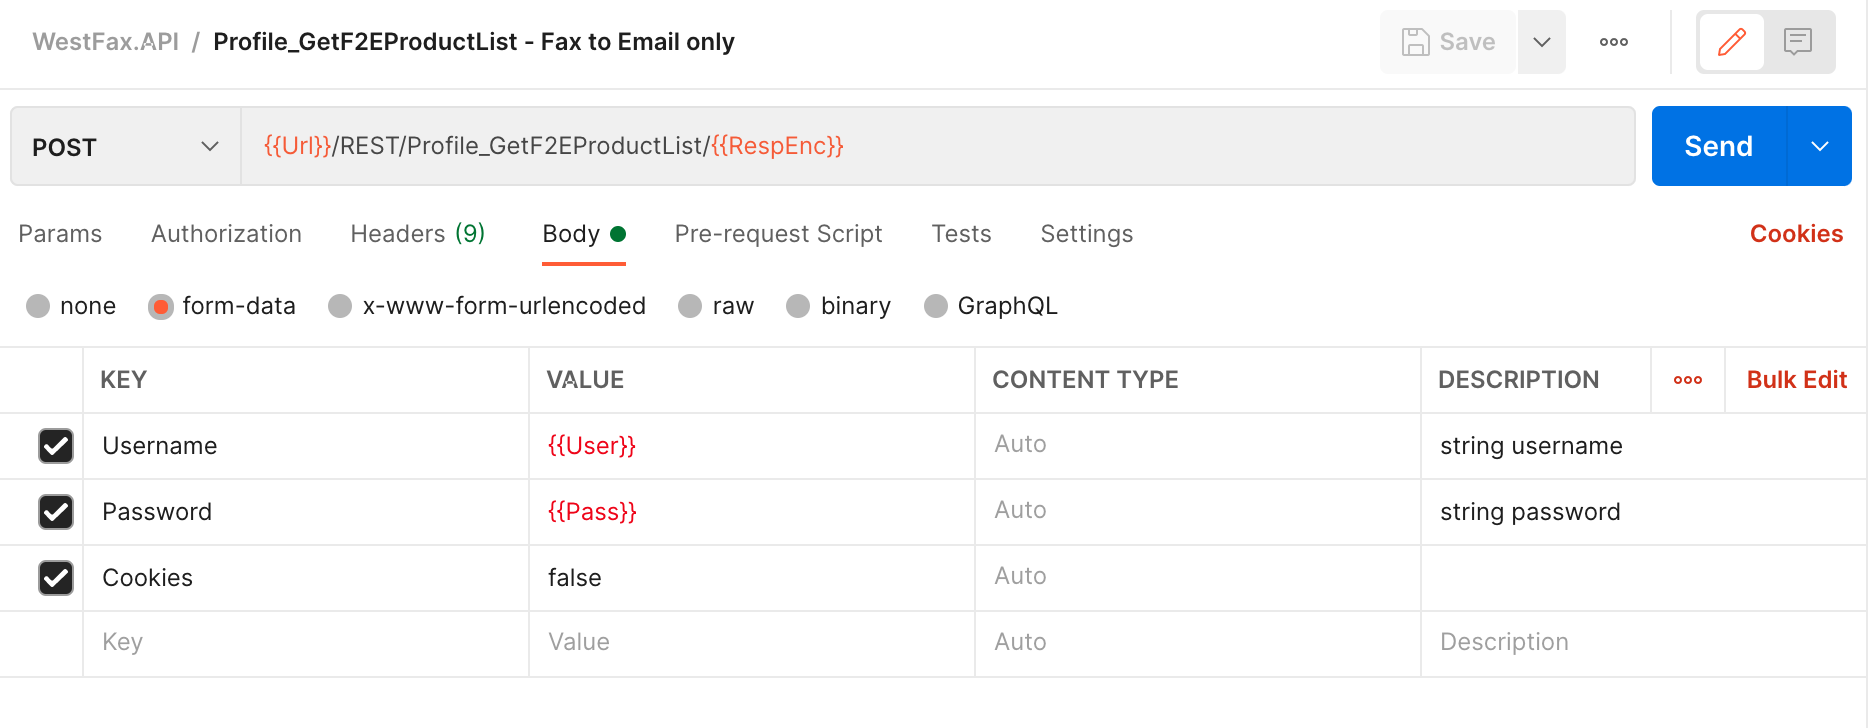
You will see the template strings {{User}} and {{Pass}}. These are just placeholders for the credentials you entered earlier into the environment variables.
Now assuming you set your username and password correctly. You should now hit SEND on the top right. The output should look something like this:
               {

                  "Success": true,

                  "Result": [

                    {

                          "Id": "111111-1111-1111-1111-1111111111",

                          "Name": "YourAccountName",

                          "PlanId": "111111-1111-1111-1111-1111111111",

                          "ProductType": "FaxForward",

                          "InboundNumber": "88885551212",

                          "TimeZone": "Pacific",

                          "ProductState": "OK",

                          "CurrentBillingPeriodStart": "2021-03-01T00:00:00Z",

                          "CurrentBillingPeriodEnd": "2021-04-01T00:00:00Z",

                          "FreeTrialEnd": "2020-10-08T23:59:59Z",

                          "PeriodicQuantity": 0,

                          "QuantityInbound": 0,

                          "QuantityOutbound": 0

                      }

                  ]

               }
You need to copy and paste the Id value into your ProductId Environment variables as we did above. You should also make a note of your fax number because you’ll need it later.
After you do that it should look like this:
Send a Test Fax
Now we can start sending a fax. For this, you will need a test document. We have one here you can use.
Let’s go open the API called named: Fax_SendFax.
When you click on BODY it will look similar to this:
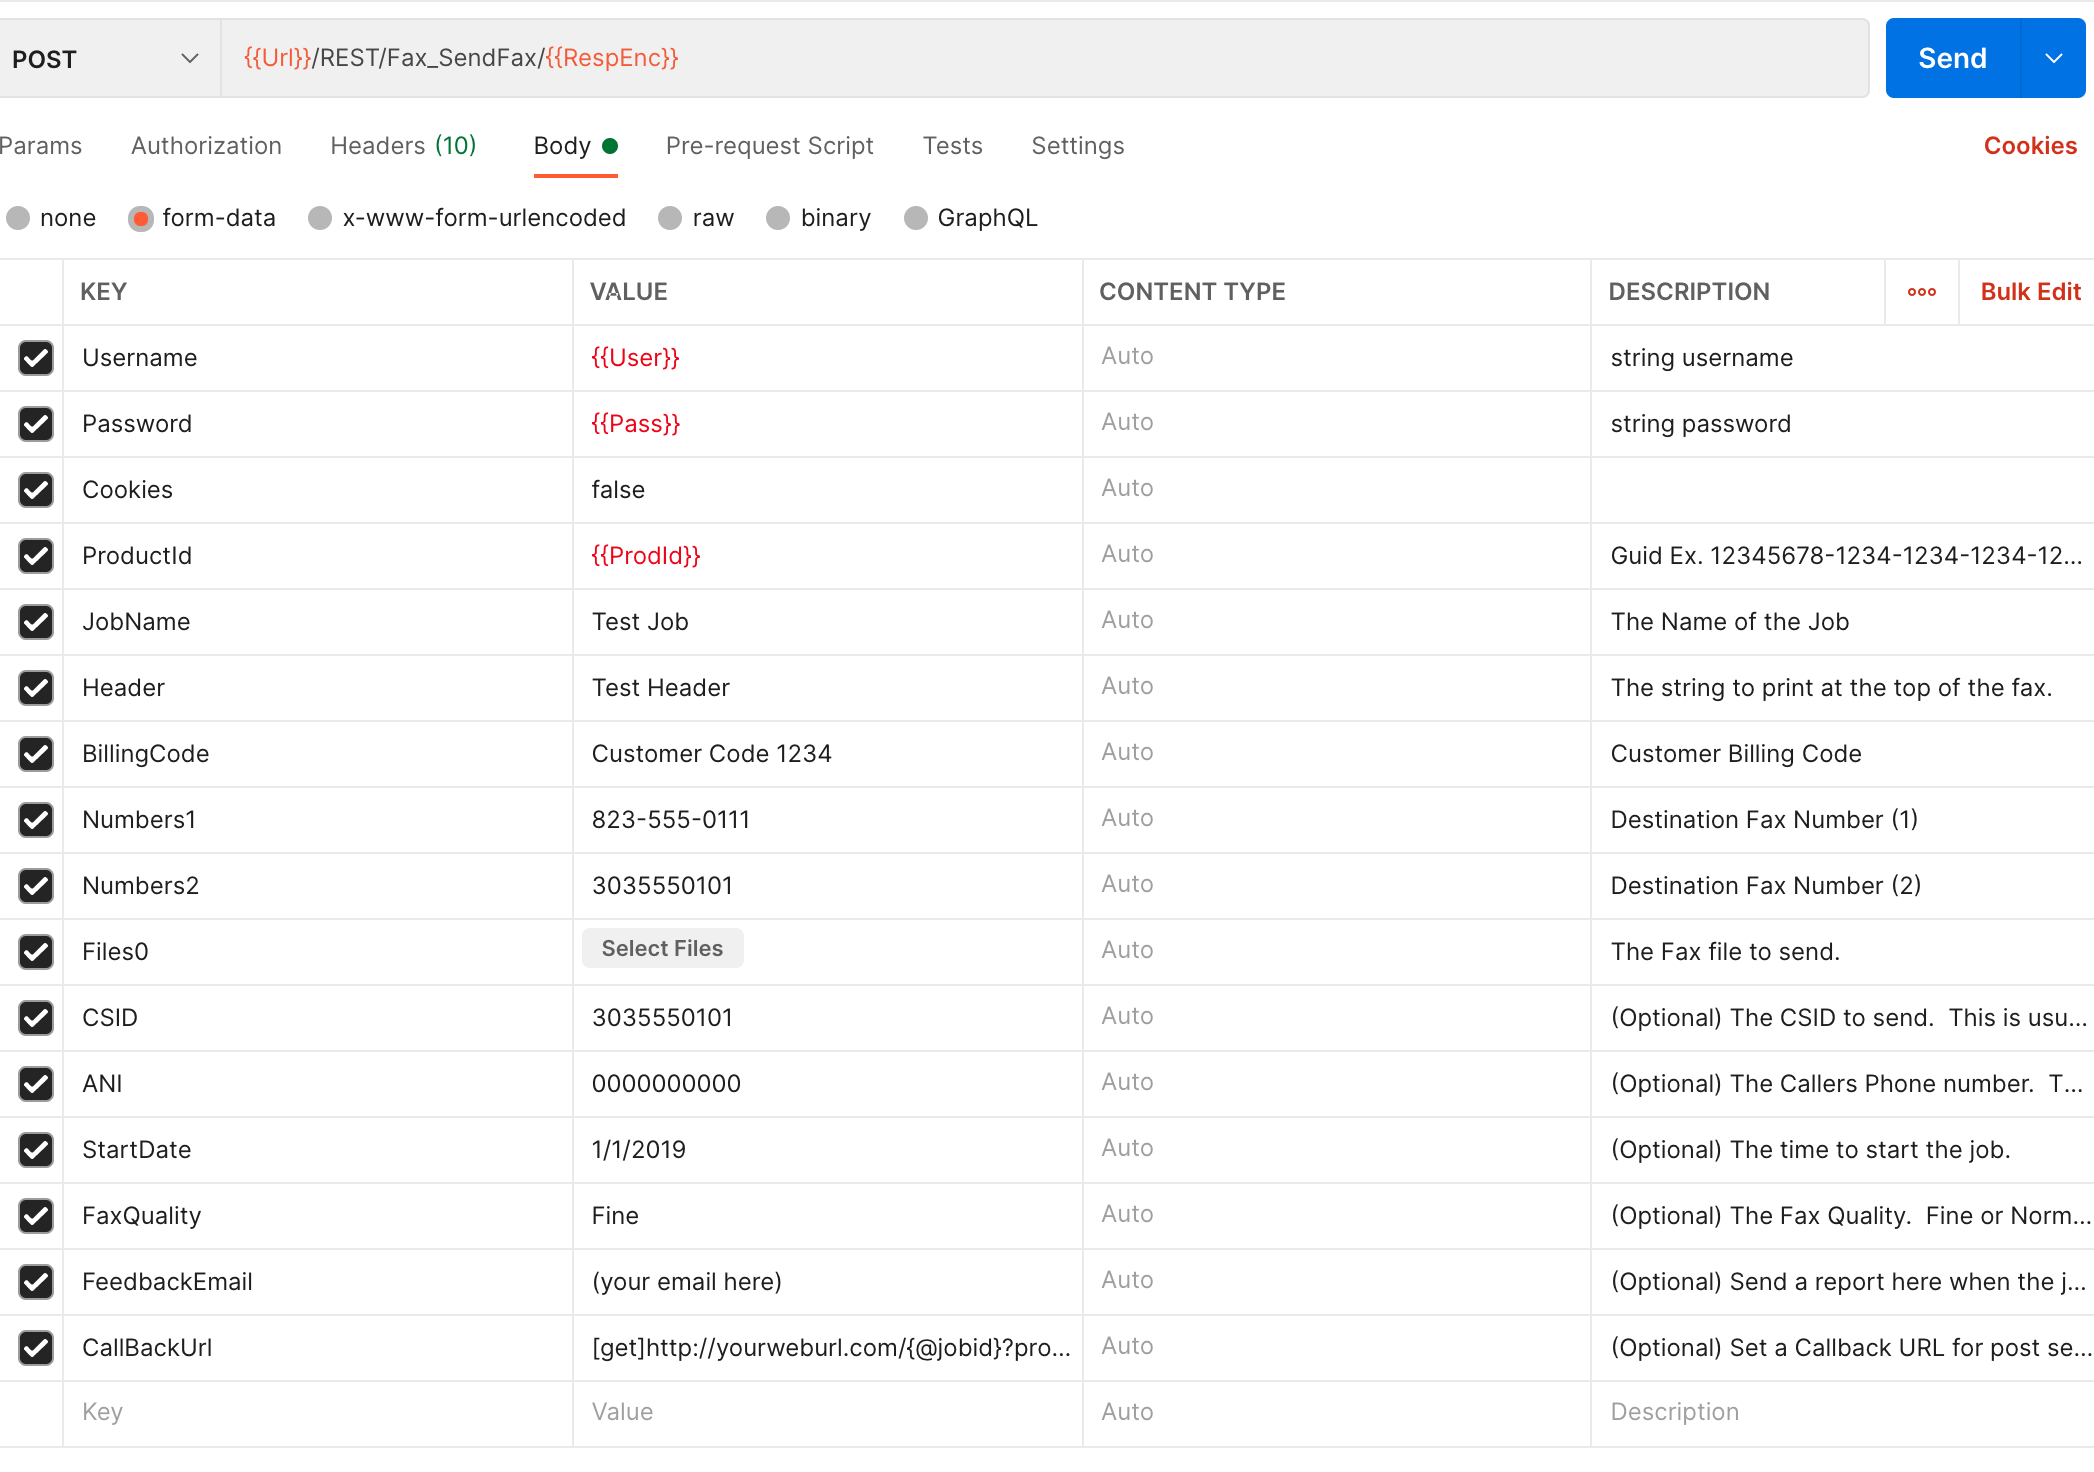
You can see here that there are three fields that are already set: User, Pass, and ProductId. Other fields you can put into a template could be CSID and ANI which should be set to your fax number. You can also set the FeedbackEmail to your email address so you get a notification when the fax is sent. The CallBackUrl is a special formatted field that we discuss in this article. For now, you should Uncheck CallBackUrl.
We’ll discuss each Parameter here. Red fields are required
- Username: This is your login. We set this in the environment variables.
- Password: This is your password. We set this in the environment variables.
- Cookies: You can leave this false.
- ProductId: This is your ProductId (APIKey). Each fax line has a different ProductId so if you have many fax lines you will want to change this out as needed.
- JobName: This is an internal field. It can be seen in certain reports. Optional
- Header: This is the Header of your fax document. It is what is seen on the top of the fax. Optional
- BillingCode: This is an internal field. It can be seen in certain reports. Optional
- Numbers1: This is the number we are going to fax to. You must have at least one fax number. Format: nnnnnnnnnn.
- Numbers2: If you are calling more than one number you can iterate on the Numbers field (i.e. Numbers3...Numbers999). Uncheck this if you aren’t using it. Optional.
- Files0: This is the first file. If you have additional files you can use an iterator (Files0...Files999).
- CSID: This is your CallerID. Usually one would use their fax number or company name. Optional
- ANI: This is your internal fax number. Use ########## format (i.e. 8885551212).
- StartDate: This should be set to the past to send now. Otherwise, you can set it to a future date to send in the future.
- FaxQuality: Fine or Normal
- FeedbackEmail: This is an email address to get a return receipt. Uncheck it if you aren’t using it. Optional
- CallbackUrl: This is a callback link. See our article about callbacks here. Uncheck if you aren’t using it. Optional
Ok, so we are going to send a test fax to ourselves. You should replace the Numbers0 with your fax number and the CSID and ANI. Also, be sure to upload a file in the Files0 field. We support most file formats. Doc(x), PDF, TIF, JPG, PNG, GIF, etc...
Here is what your Postman should look like:
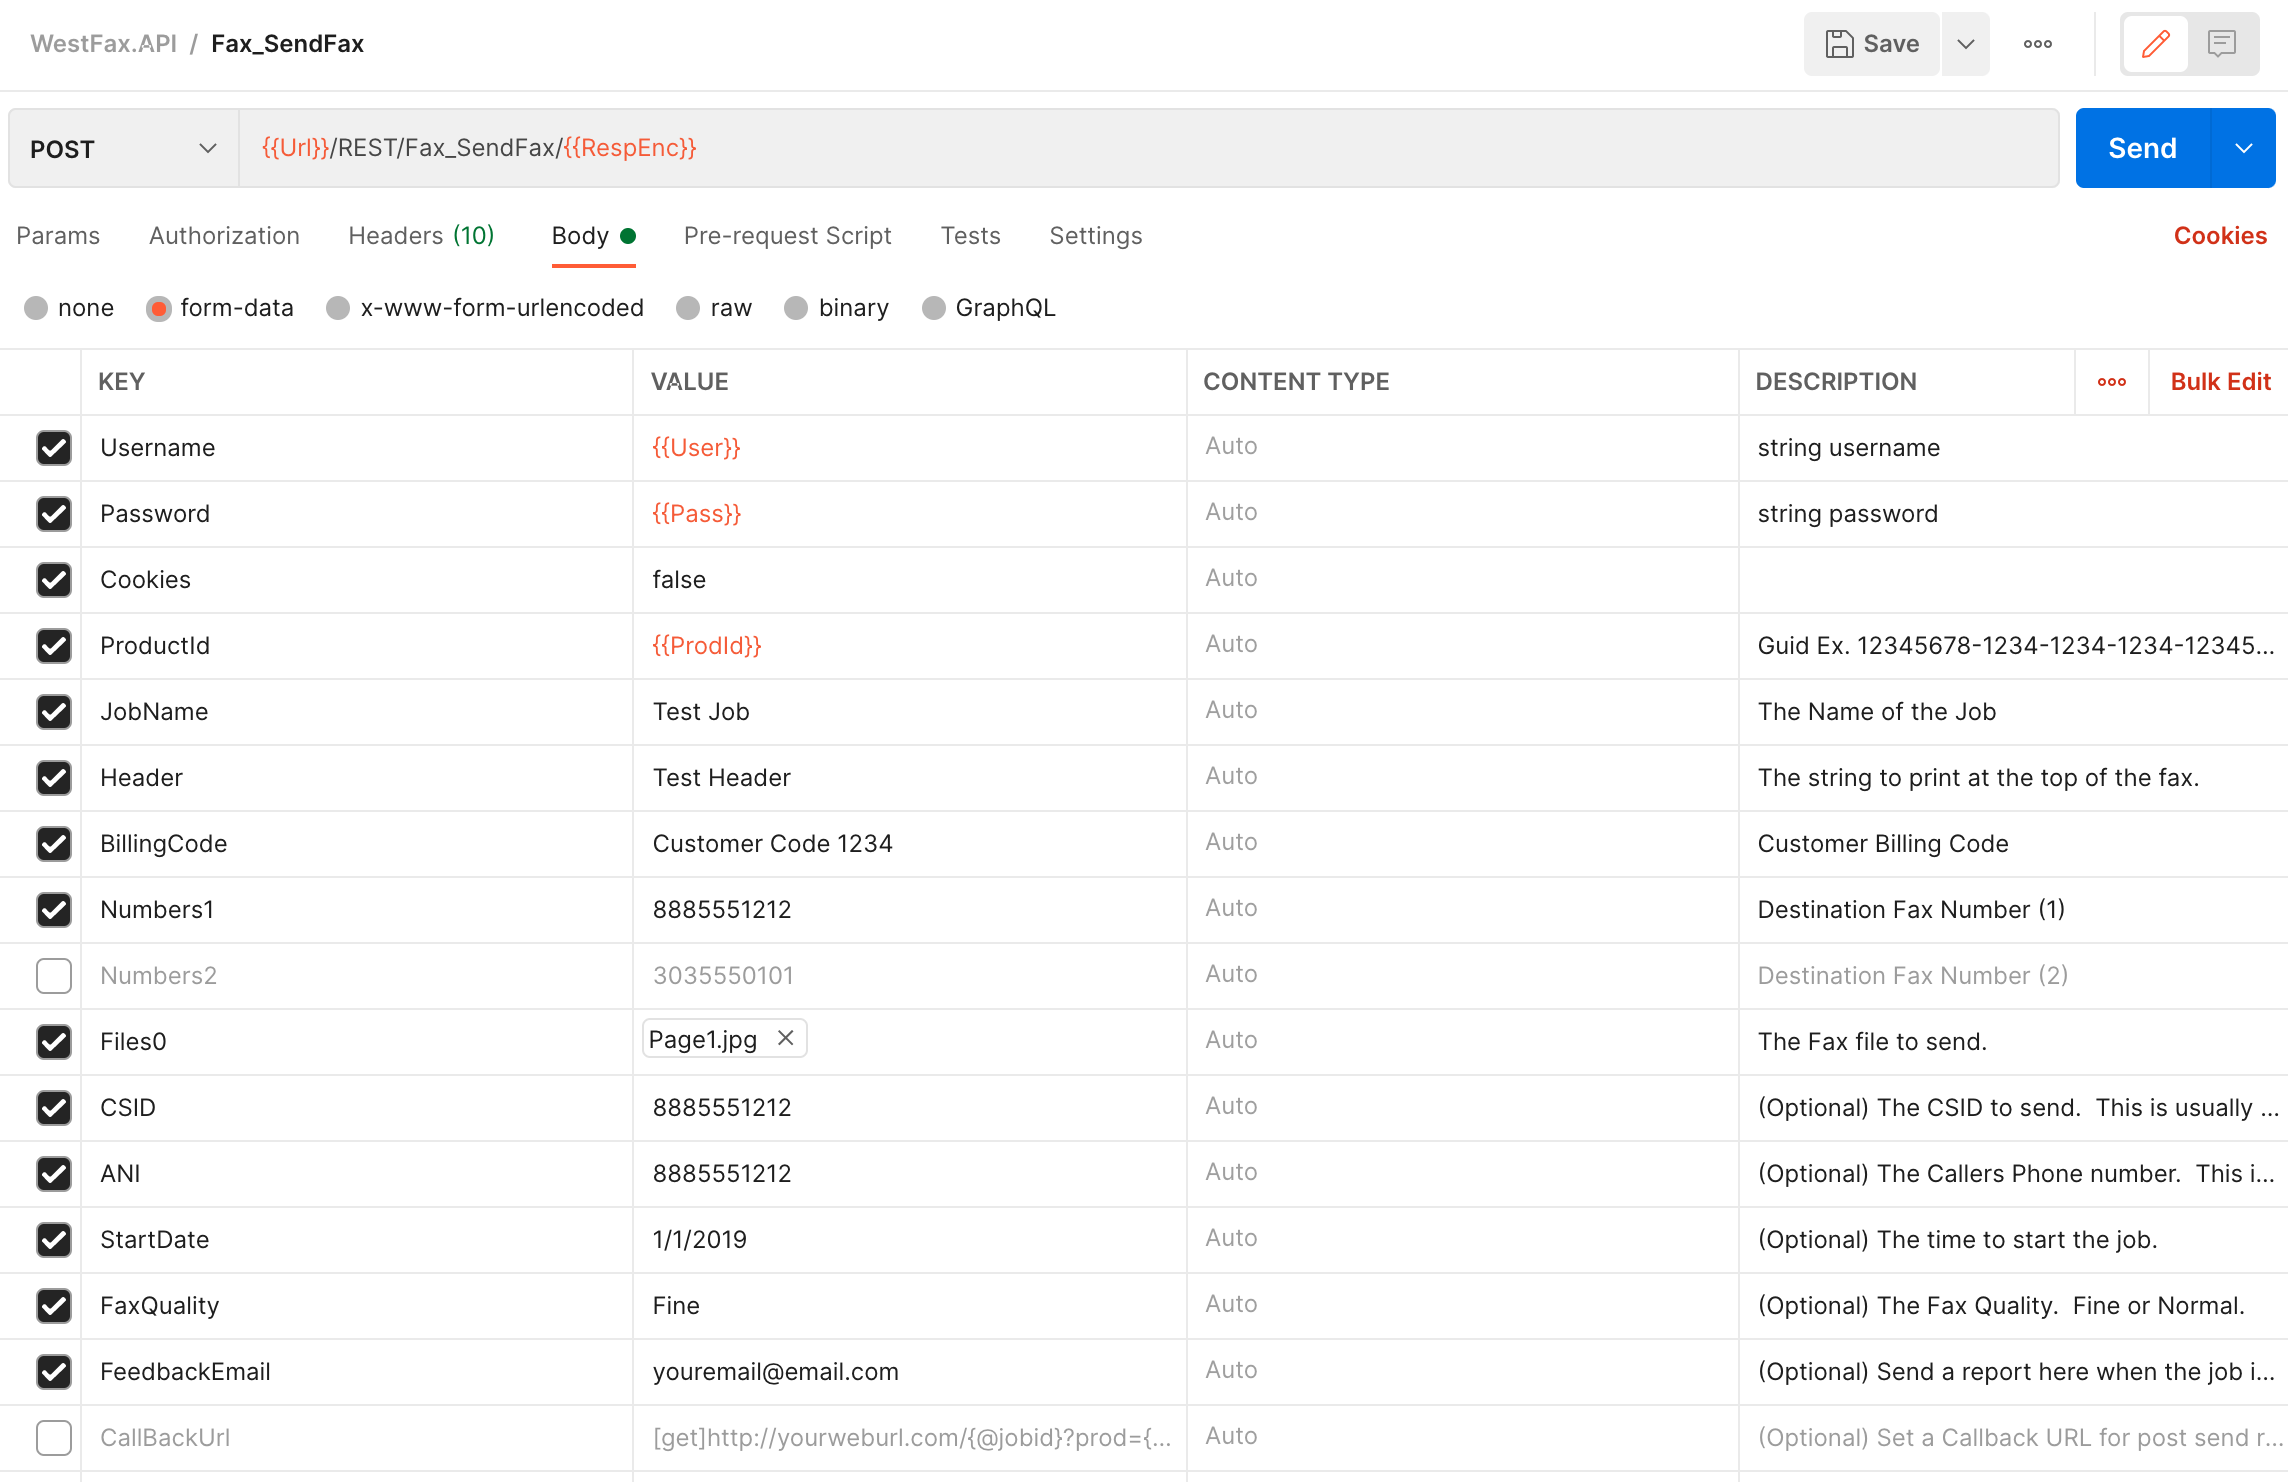
If everything is set correctly you can hit SEND in the top right.
You will see a result code in JSON like this:
      {

         "Success": true,

         "Result": "54686546-a8fe-4b09-9d3b-96cc746fb6c6"

      }
If you messed up your password or username you will get this.
      {

         "Success": false,

         "ErrorString": "Handler_Failed_",

         "InfoString": "Authorization_Failed_BadUsernamePassword"

      }
You can verify your user/pass by logging into the WestFax Home Portal which is your inbox/outbox view on the web.
If you get a different error please reach out to us at develop@westfax.com and we’ll give you a hand.
Generate Code and Get Help
Ok, you sent a fax! That was easy. Now if you want to generate the code you can use Postman's code feature that will generally give you good clean code. In some cases, you may need to tweak it a bit but it’ll get you 90% of the way there. You can generate code by clicking the </> button on the right side of the postman interface:
You will see this dialog pop up. You can toggle between different languages and frameworks: Language chooser
That's it! Should you need any assistance just email us at develop@westfax.com or give us a call at 303-299-9329. Happy Faxing!