How to Setup Internet Faxing on Lexmark MFP Copiers
Have a Lexmark MFP or copier? Lose the fax line and get digital today. Get your Lexmark MFP setup to send fax with no fax line. Cloud fax has never been so easy!
 In this guide we will walk you through setting up your Lexmark MFP to send faxes without an extra app or complicated setup. You just hit the Fax button, type in the number and the scanned document will be sent. There are a few things you need to do before you can start setting up your HP to send faxes.
- MFP Setup pre-requisites
- WestFax account
- Set up an email address as an allowed sender.
MFP Setup pre-requisites
There are a few things you need to have set up on your MFP before you get started. You may be the administrator or you may need an administrator to perform these actions. This article will not address these issues as one can google this information or have your admin set this up.
Pre-requisites:- MFP must be connected to the internet
- MFP must have an Email server connected (usually used for Email Scanning)
- MFP must support Internet Fax
WestFax Account
Need a HIPAA Fax account? Review our HIPAA Compliant Fax page and explore our plans.
Setup up an email address as an allowed sender
An allowed sender is an email address that is configured to send faxing via email. To add an allowed sender you need to have your account created (previous step) or have an existing account with WestFax.
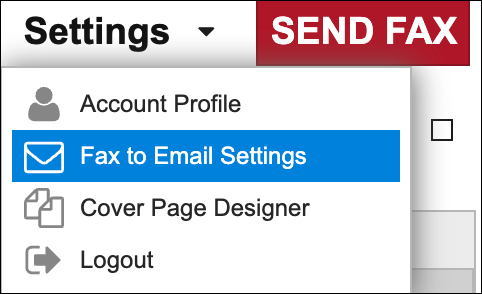
In the https://home.westfax.com portal you go to Settings -> Fax to Email Settings and add the email address of your MFP or the email address that your MFP utilizes to send documents. MFPs can be configured to send from one account or can use the user's account. If you aren't sure ask your administrator.
Now you add the email address here and indicate if you want a return receipt sent to the sender when the fax is complete.

If you have any questions or need assistance please contact us for more information.
Lexmark Setup
We will show you how to set up your Lexmark MFP to send outbound faxes via FAX setting and Email to Fax routing. You must have admin access and know the IP address of your MFP device
- Login into the Lexmark printer web page Open your favorite internet browser and type in the IP address of the printer.
- Go to Fax -> Settings From the Fax Mode menu, select Fax Server, and then click Save.
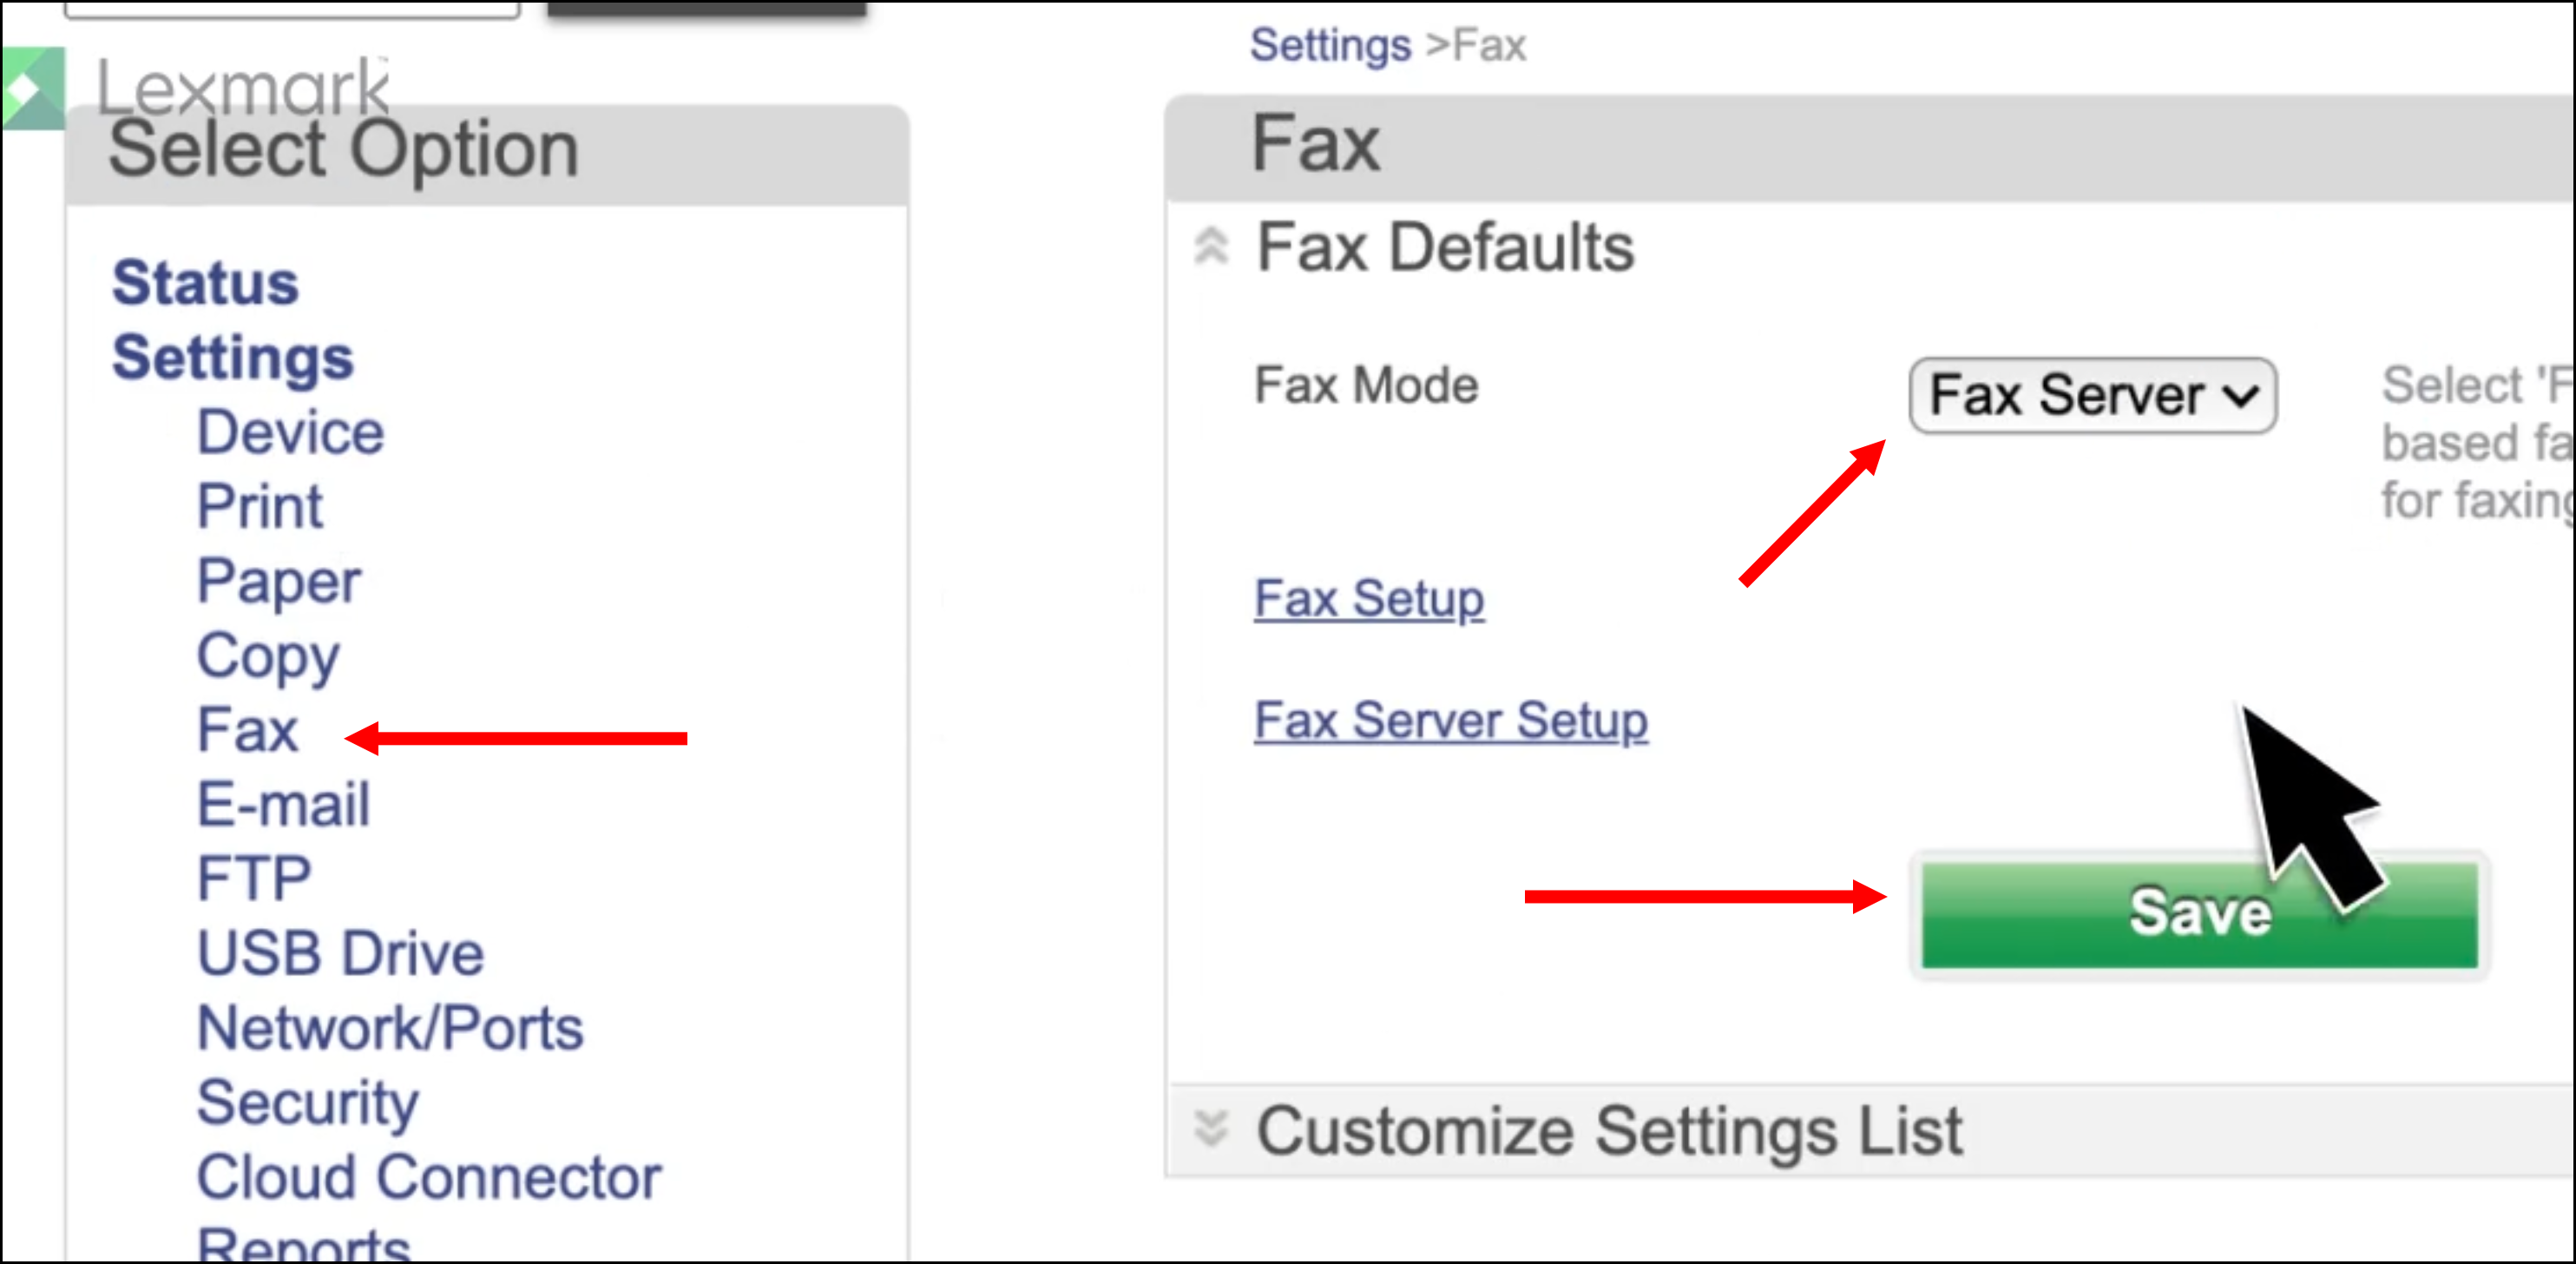
- Click Fax Server Setup. In the To Format box, type [#]@westfax.com, where [#] is the fax number and westfax.com is the fax provider domain.

Note: If needed, configure the Reply Address, Subject, or Message fields. The reply address will need to match the Allowed Sender address. If you want to force a cover page you can put /cp in the subject.
Click Save - Click Fax Server Email Settings Now you can do one of the following:
- Enable Use E‑mail SMTP Server.
This uses the existing SMTP server you have setup already for this device, or - Configure the SMTP settings.
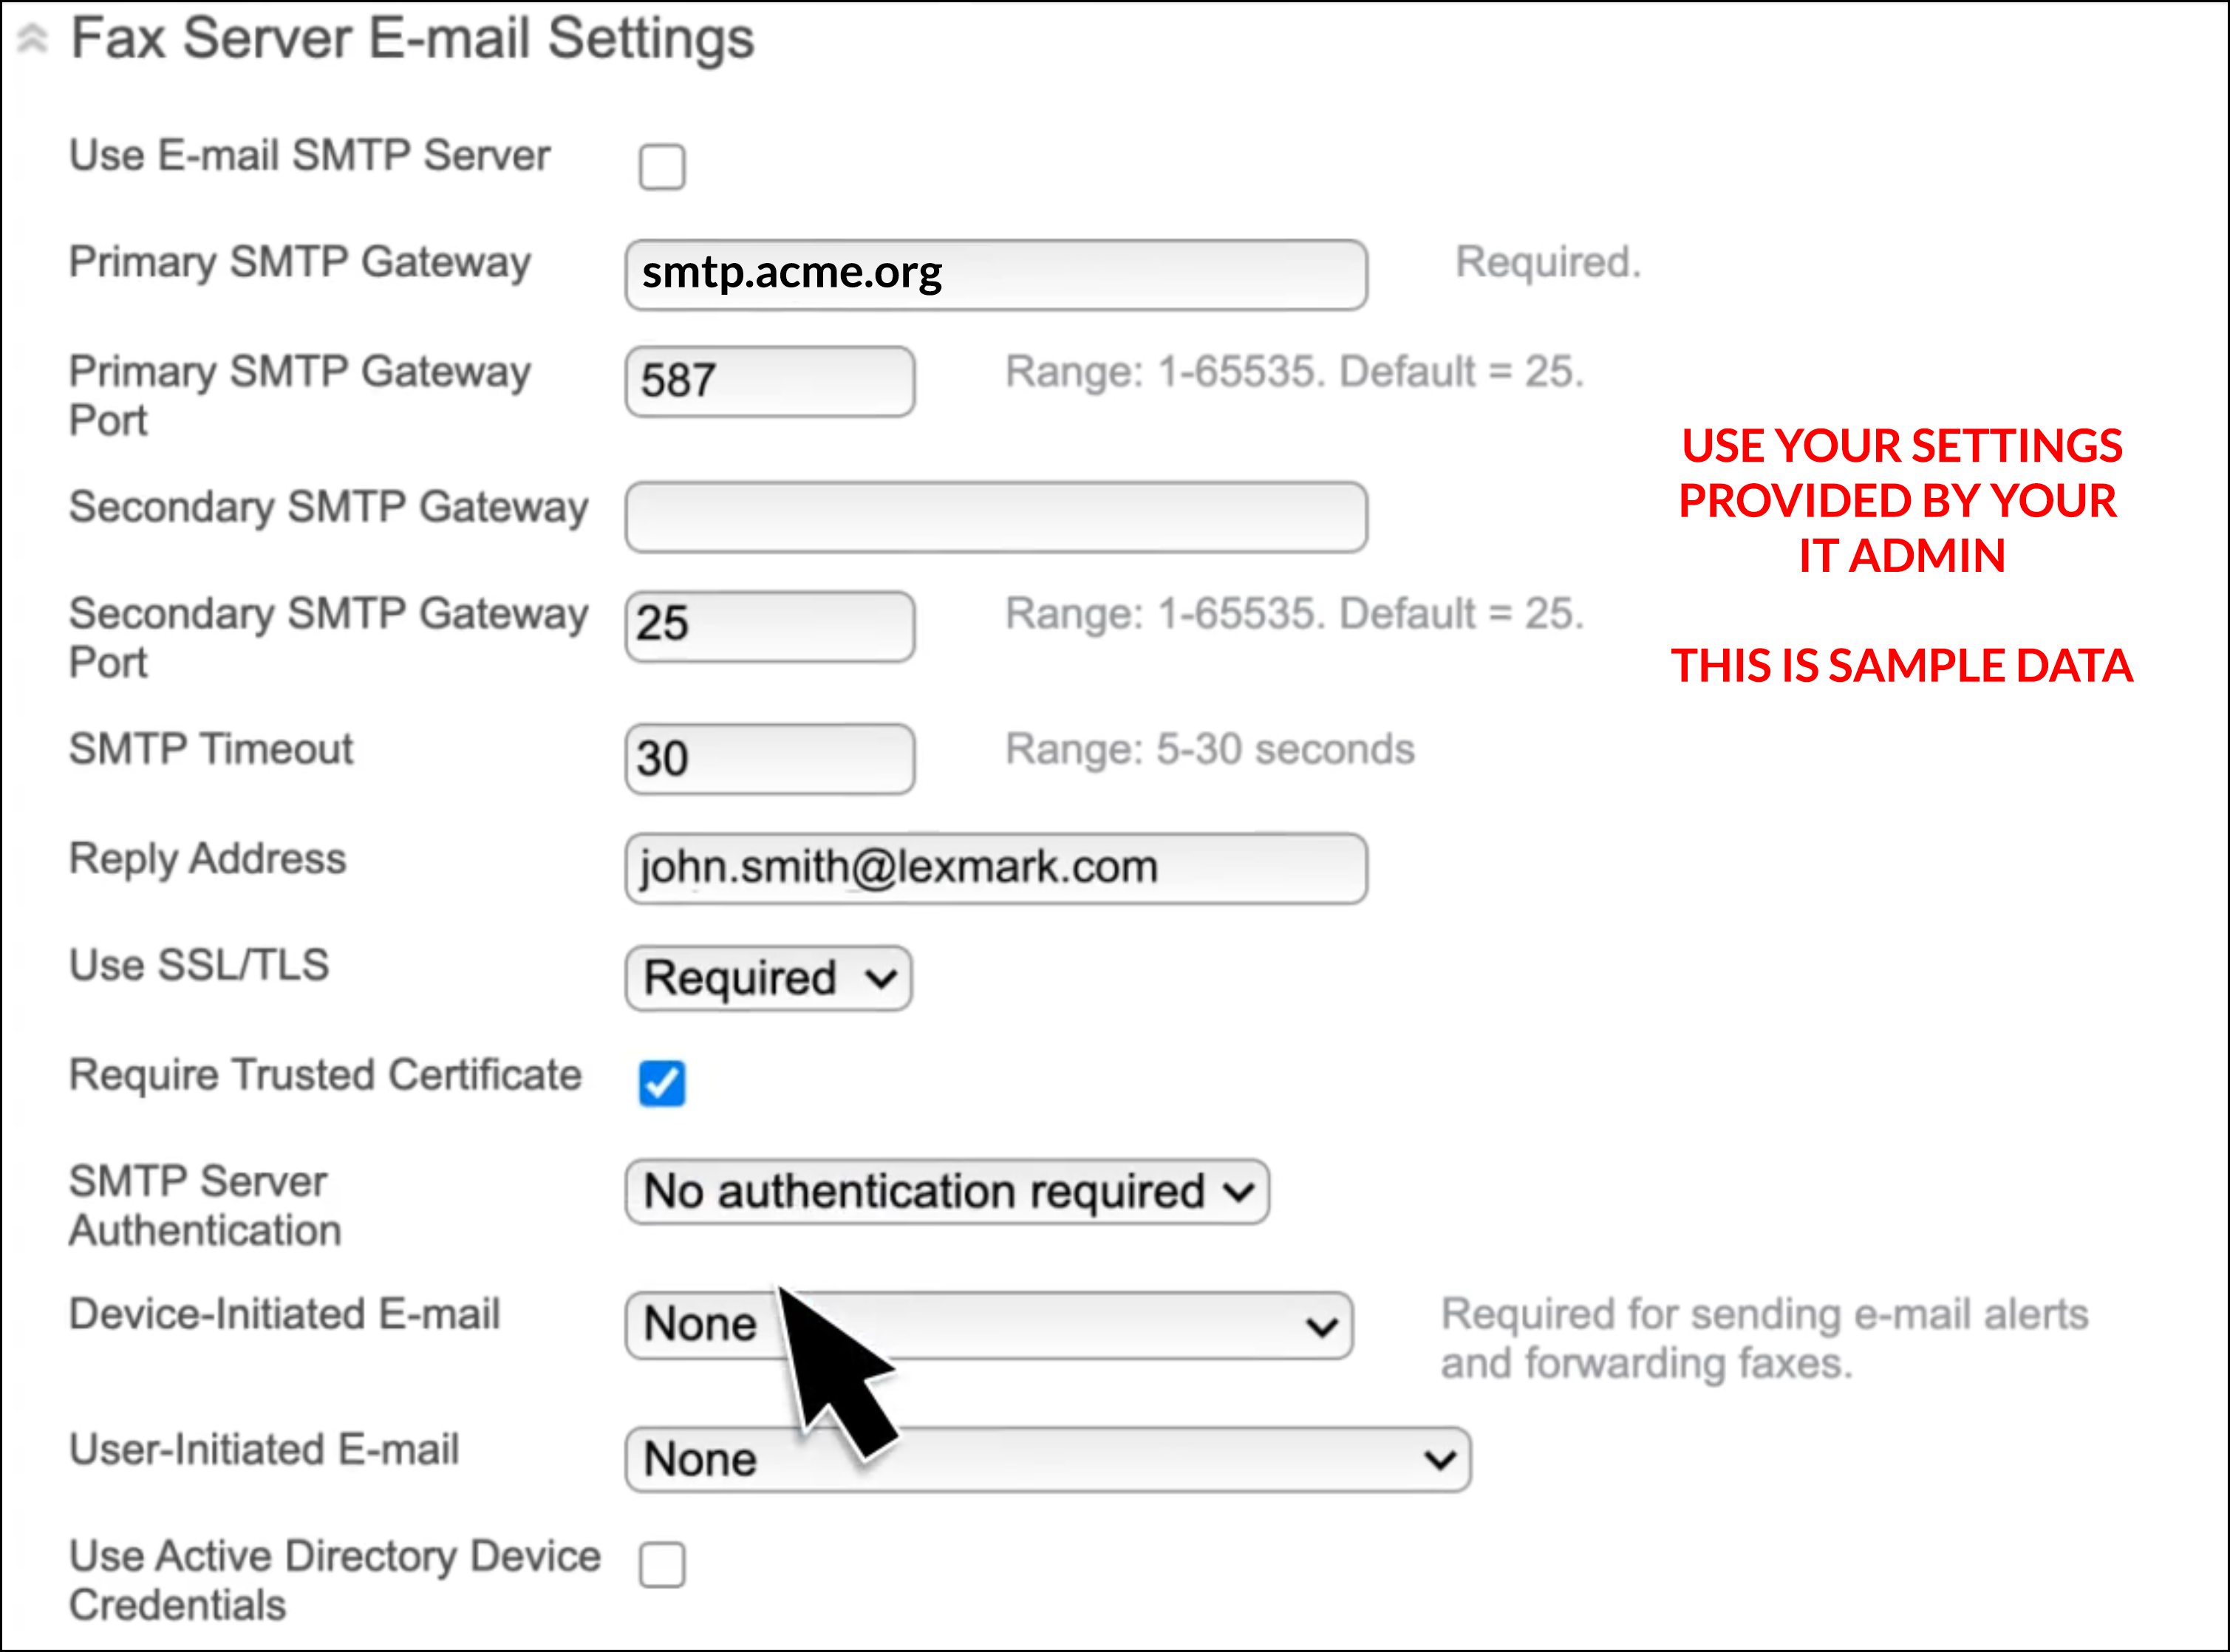
- Enable Use E‑mail SMTP Server.
- Click Save - That's it!
Additional resources:
Reach out to us today at 800-473-6208 or sales@westfax.com to learn more.