How to setup internet faxing on Xerox MFP copiers
Xerox MFPs are easy to convert to digital cloud fax. This guide walks through configuring WestFax Server Fax using SMTP so users can send faxes directly from the device without a dedicated phone line.
 In this guide we will walk you through setting up your Xerox MFP to send faxes without a fax line or extra software. Once configured, users can simply tap the Fax button, enter a number, and send documents through WestFax.
Pre-requisites:
- Xerox MFP with Server Fax or Internet Fax support
- WestFax account
- SMTP server access
- An email address configured as an allowed sender in WestFax
MFP Setup pre-requisites
Before you begin, make sure your Xerox device is already configured for network use. These steps are usually handled by your IT administrator.
- MFP must be connected to the internet
- MFP must have access to an SMTP server for outbound email
- MFP must support Server Fax or Internet Fax
WestFax Account
Getting started is simple. Visit our HIPAA Compliant Fax page to explore plans and create your account.
Set up an email address as an allowed sender
An allowed sender is the email address your MFP will use to send faxes through WestFax. This is required for authorization and security.
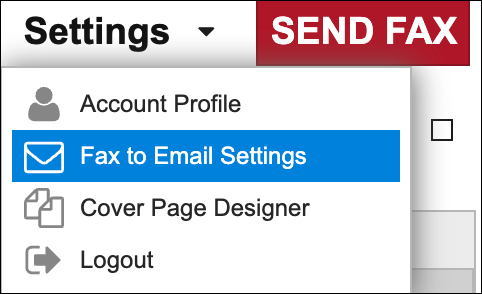
Log in to the WestFax portal and navigate to Settings -> Fax to Email Settings.
Add the email address your Xerox device will use as its sender address, such as fax@yourdomain.com. If this email address is not approved, WestFax will reject outbound faxes from the device.

If you need help, contact us.
Xerox Setup pages
Your interface may vary slightly depending on model and firmware, but the steps are generally the same across Xerox MFP devices.
First, log in to your Xerox device web interface using administrator credentials.
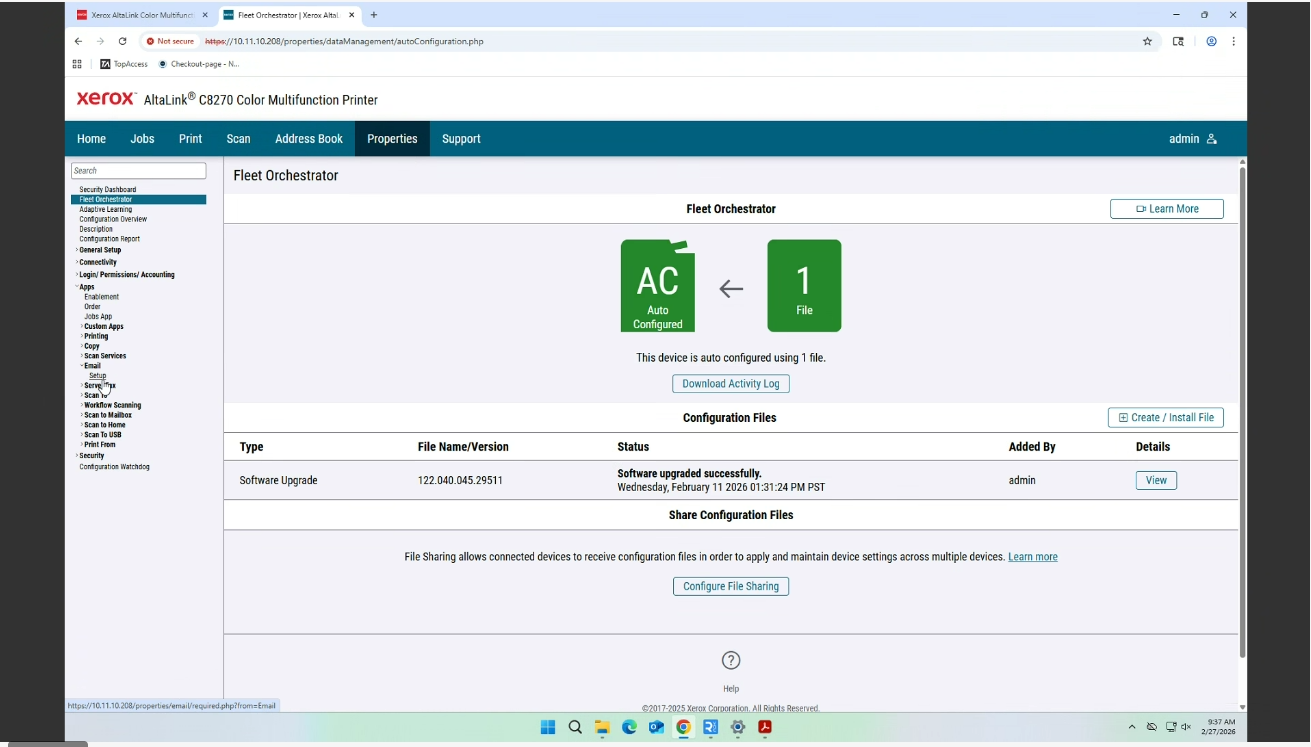
Access Email Setup
Server Fax relies on SMTP, so you will first configure the email settings used by the device.
Navigate to the Xerox email setup area.
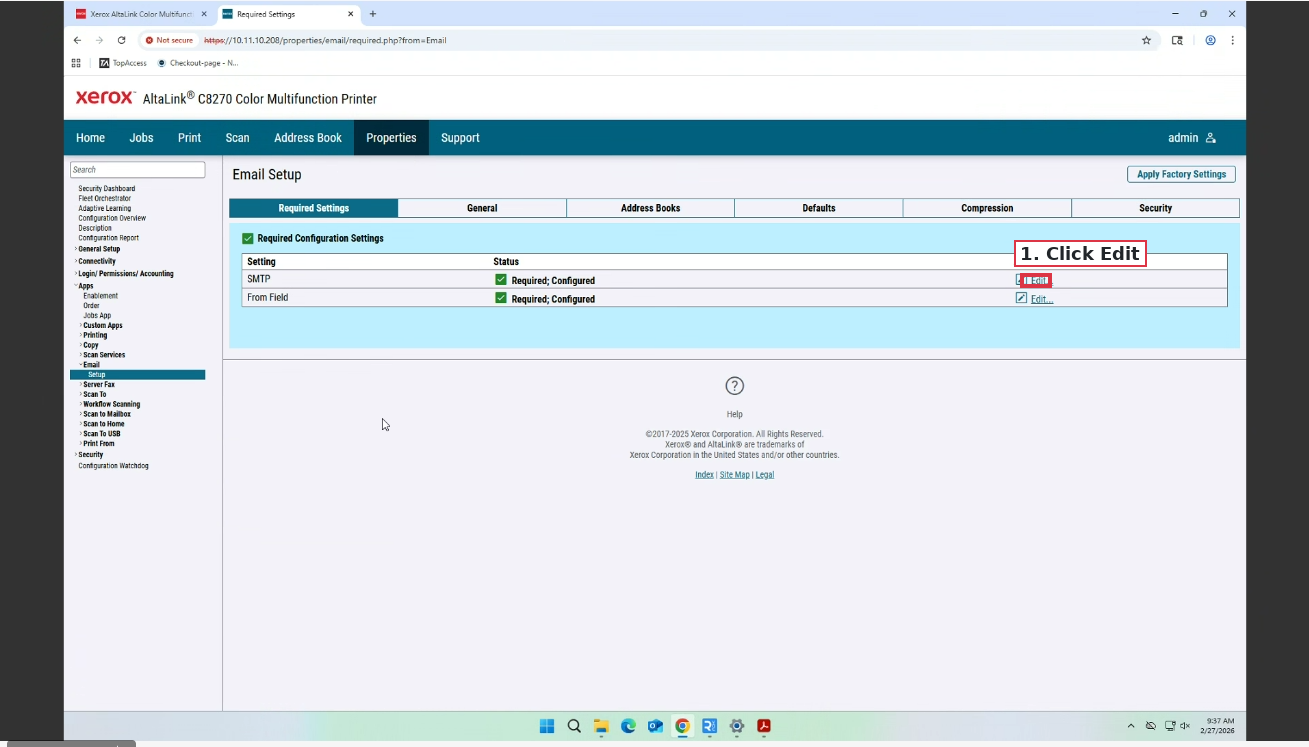
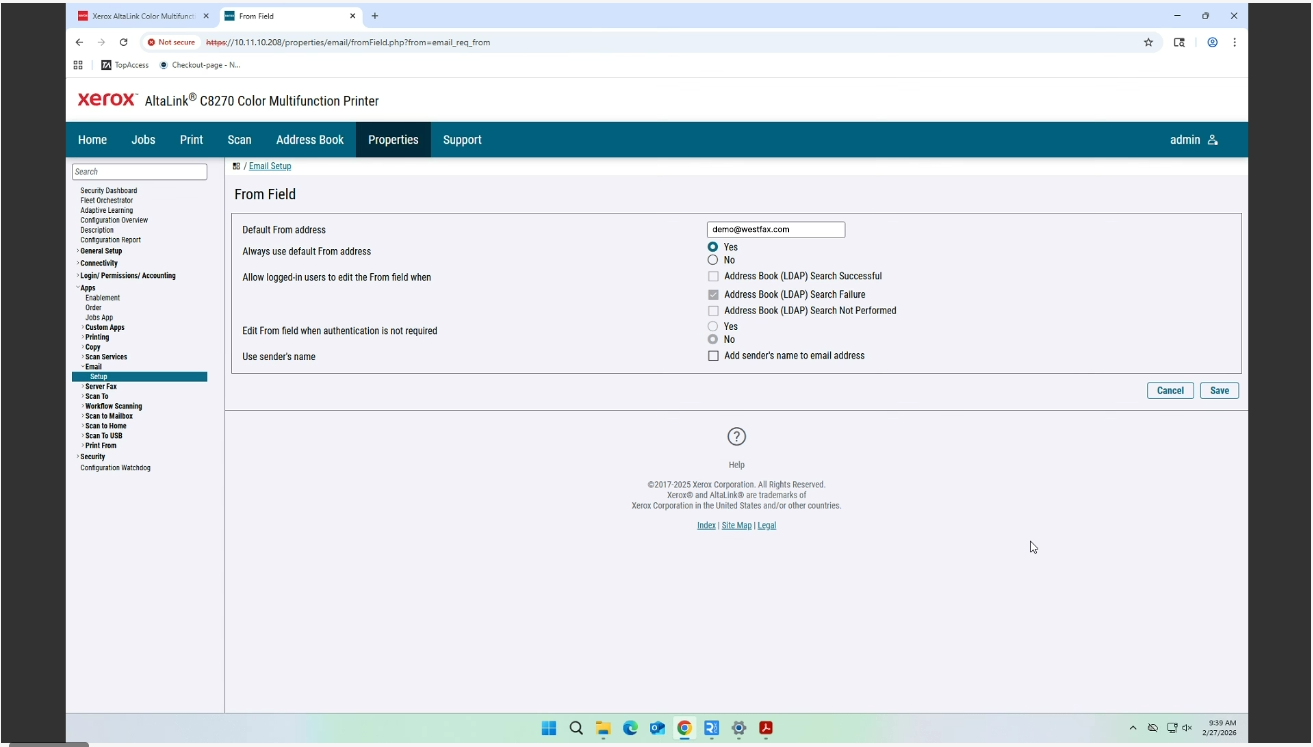
Configure the From Field
Set the device's default sender address. This should match the email address you added as an allowed sender in WestFax.
Recommended setting:
- Default From Address: your approved device email address
- Always use default From address: Yes
After saving the From Field settings, you can verify the status on the Email Setup page.
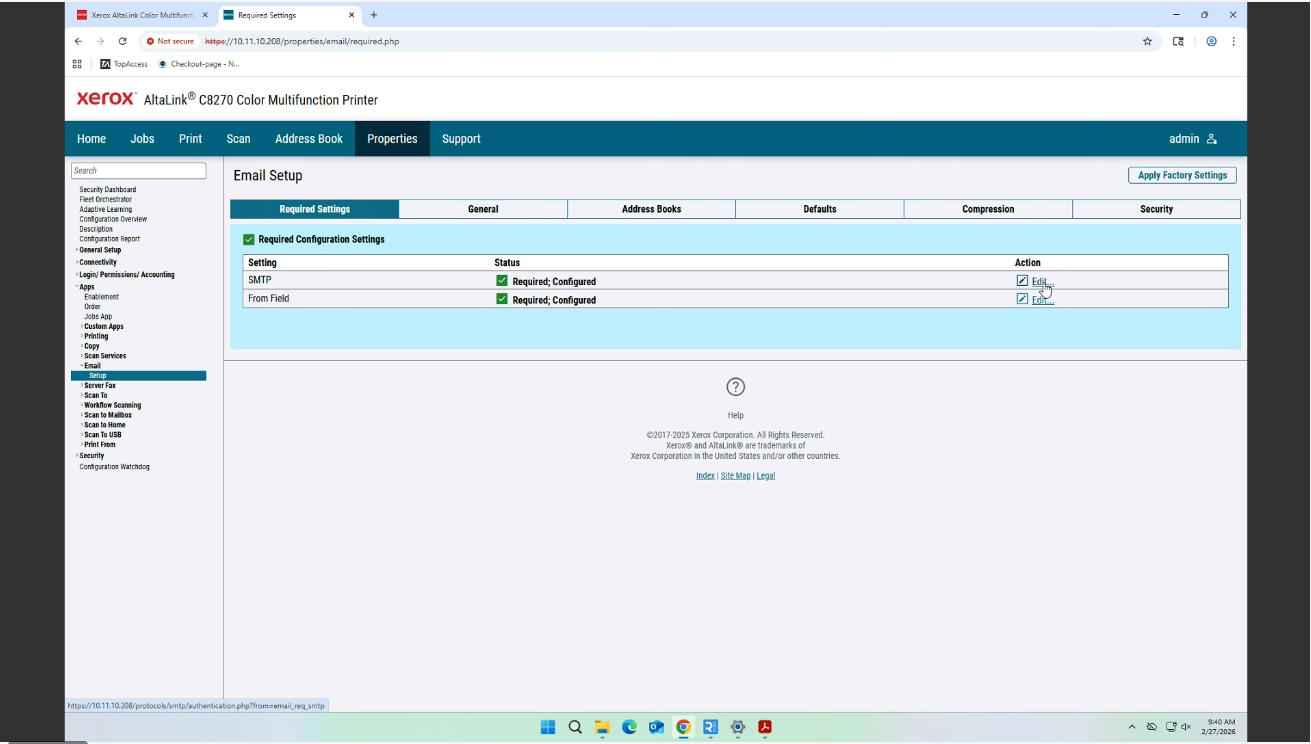
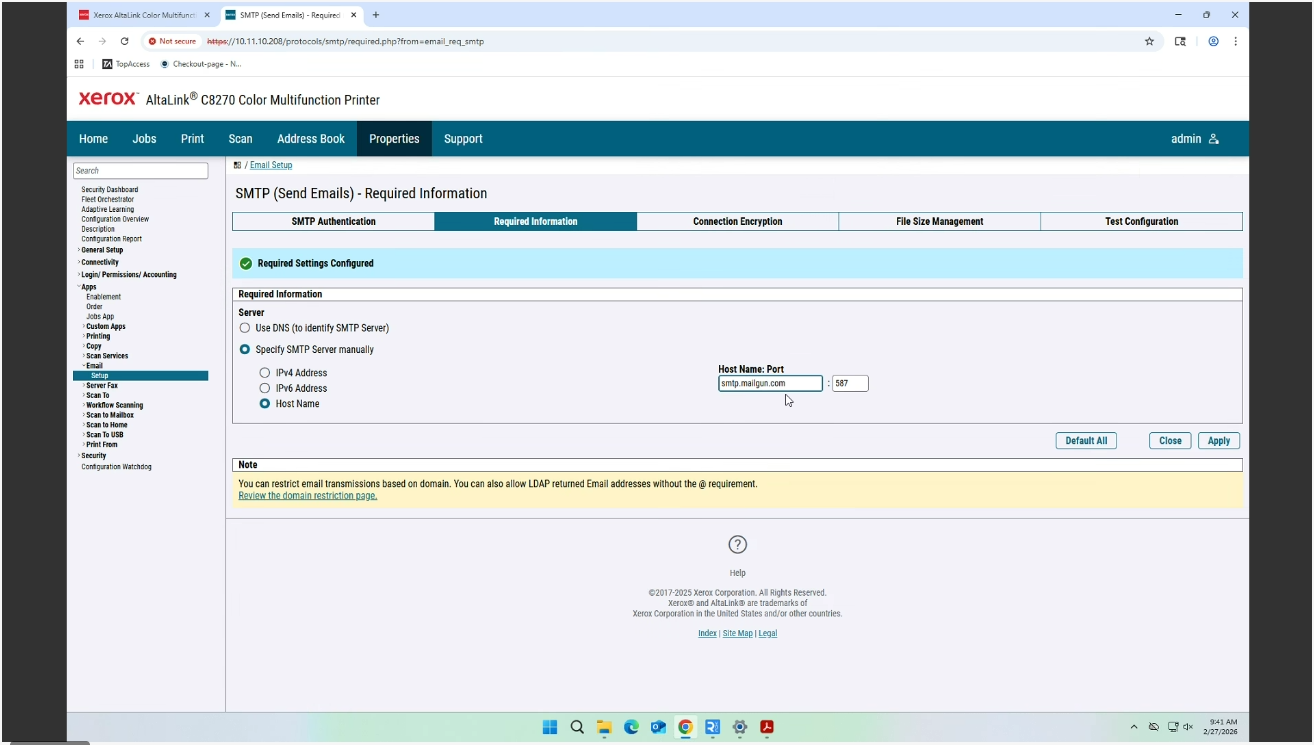
Configure the SMTP Server
Enter the SMTP server used by your organization. This might be Microsoft 365, Google Workspace, Mailgun, or another email provider that allows authenticated outbound mail.
- SMTP Server: your mail server hostname
- Port: typically 587
- Authentication: enabled
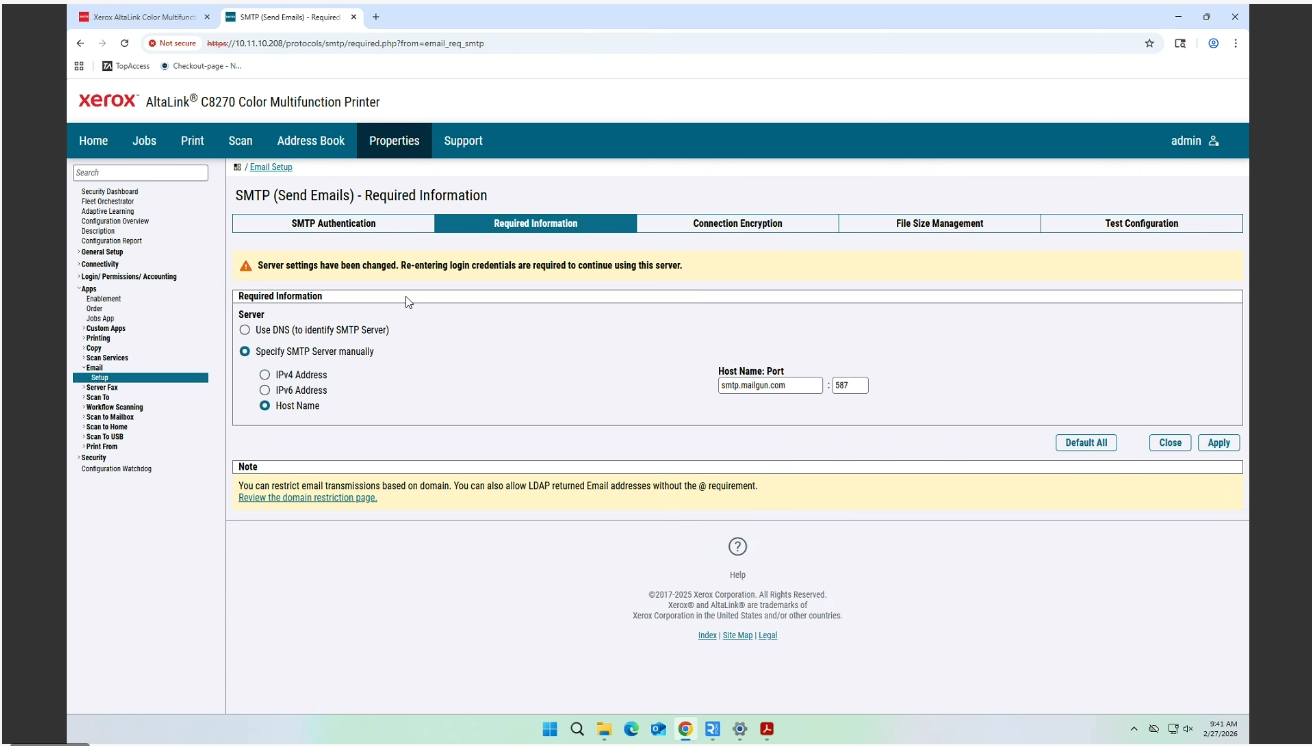
Depending on the device, you may see a confirmation or warning after changing the SMTP server settings.
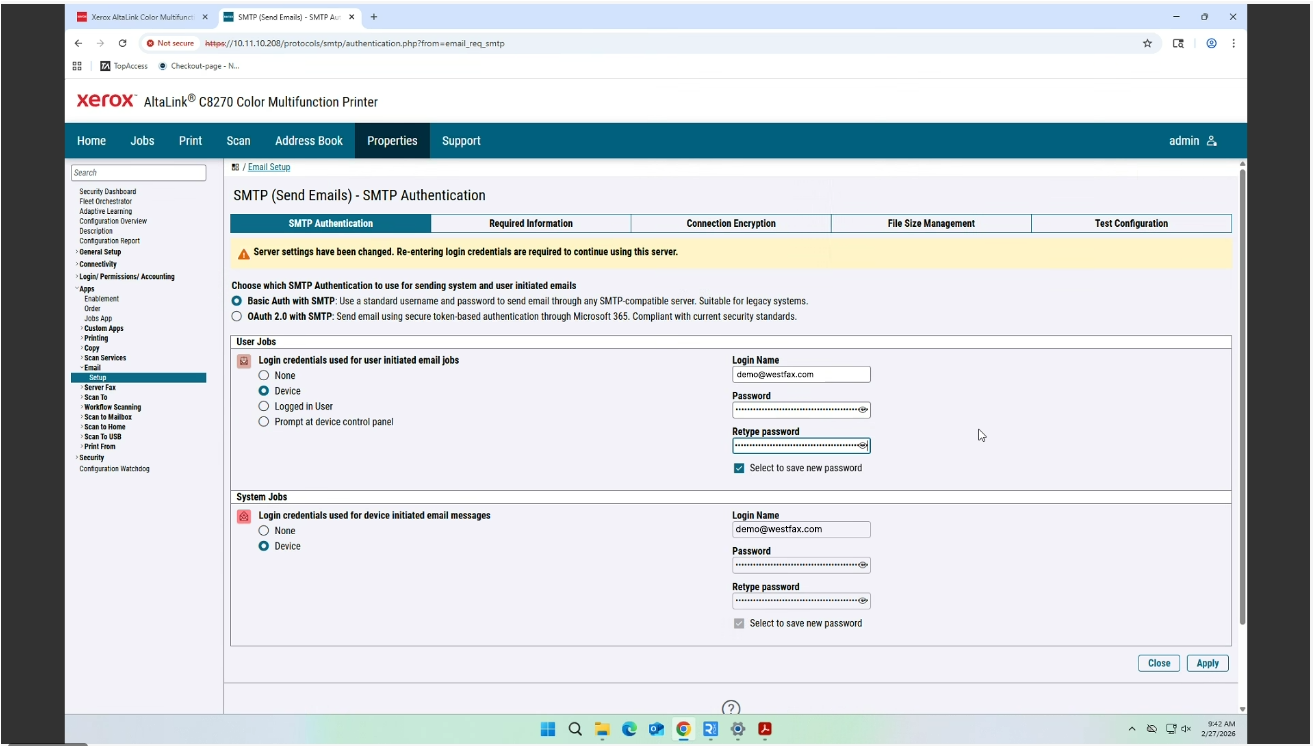
Configure SMTP Authentication
Enter the username and password the Xerox device should use to authenticate with your SMTP server.
- Authentication Type: Basic Auth with SMTP, if supported by your mail provider
- User Jobs: Device
- System Jobs: Device
- Username: your SMTP username
- Password: your SMTP password
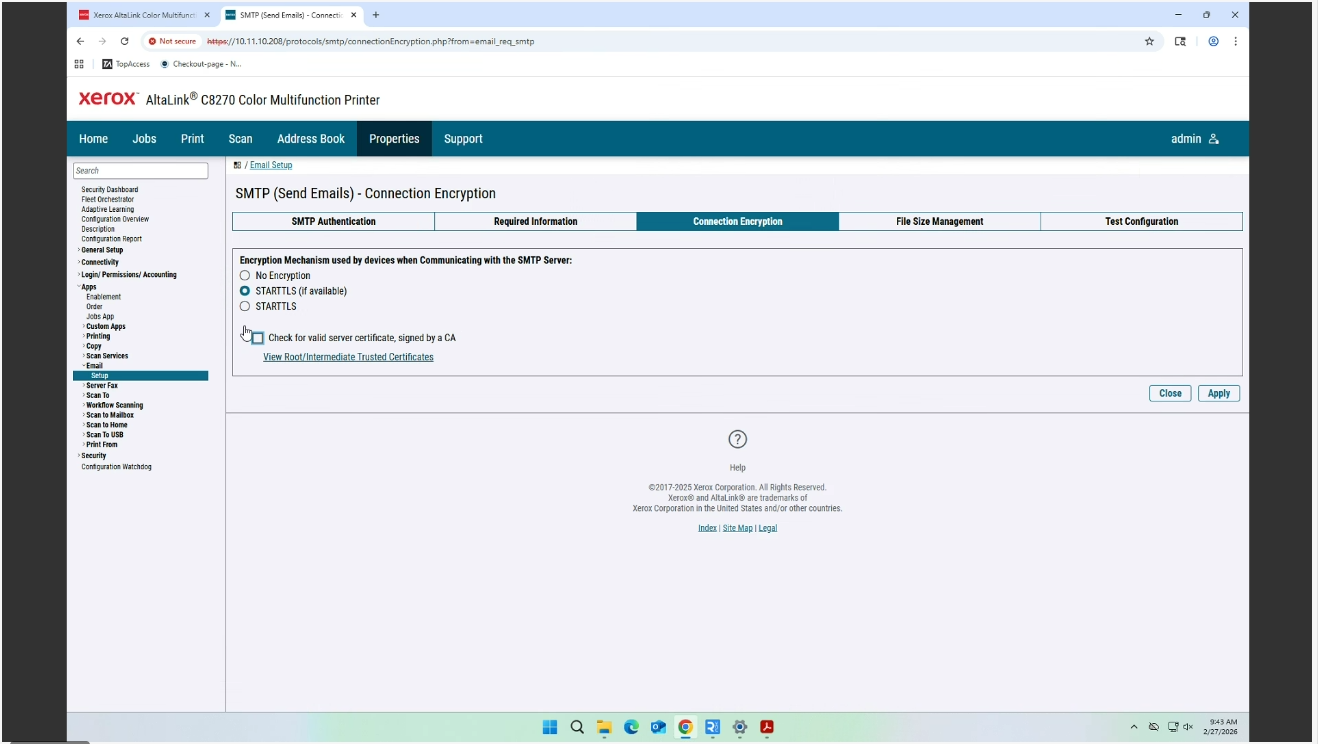
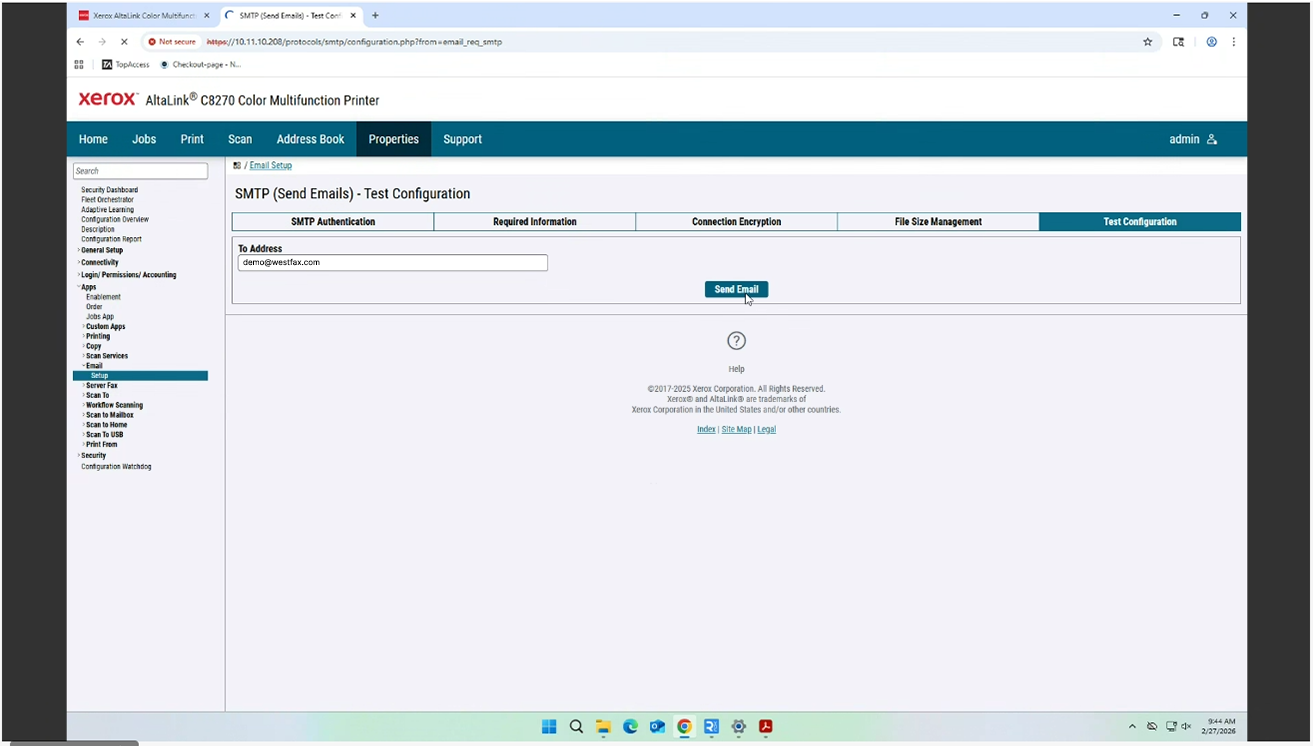
Configure Encryption and Test SMTP
For security, use encrypted SMTP whenever possible.
- Connection Security: STARTTLS or TLS
- TLS: preferred when available
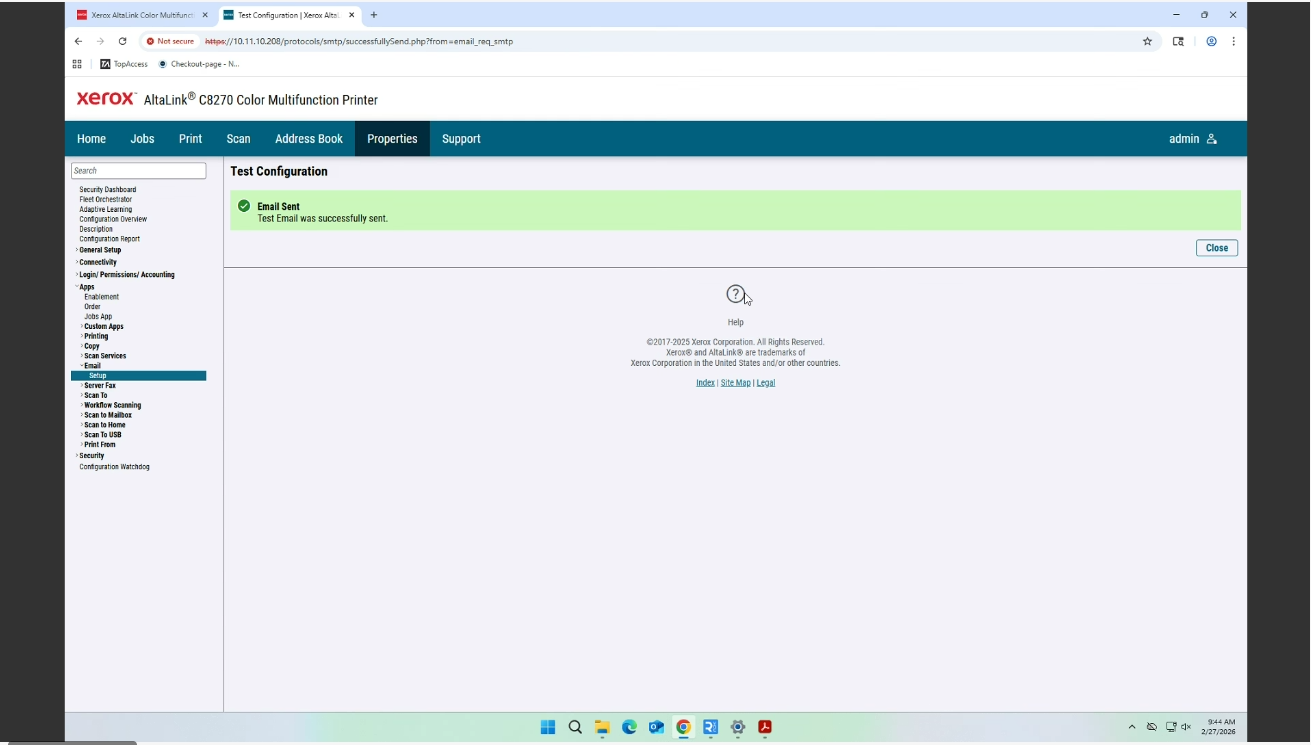
Next, send a test email to verify everything is working.
Once successful, confirm the email configuration is complete.
Configure Server Fax Protocol
With SMTP working, navigate to the Server Fax configuration area and set the transfer protocol to SMTP.
The device will use the SMTP settings you just configured.
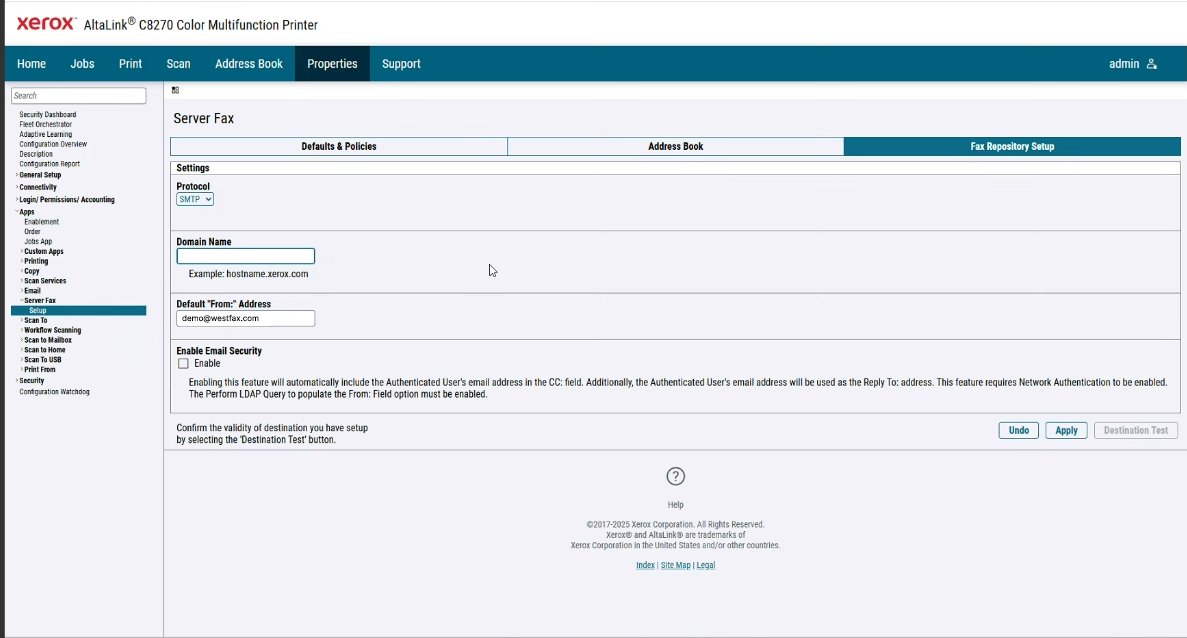
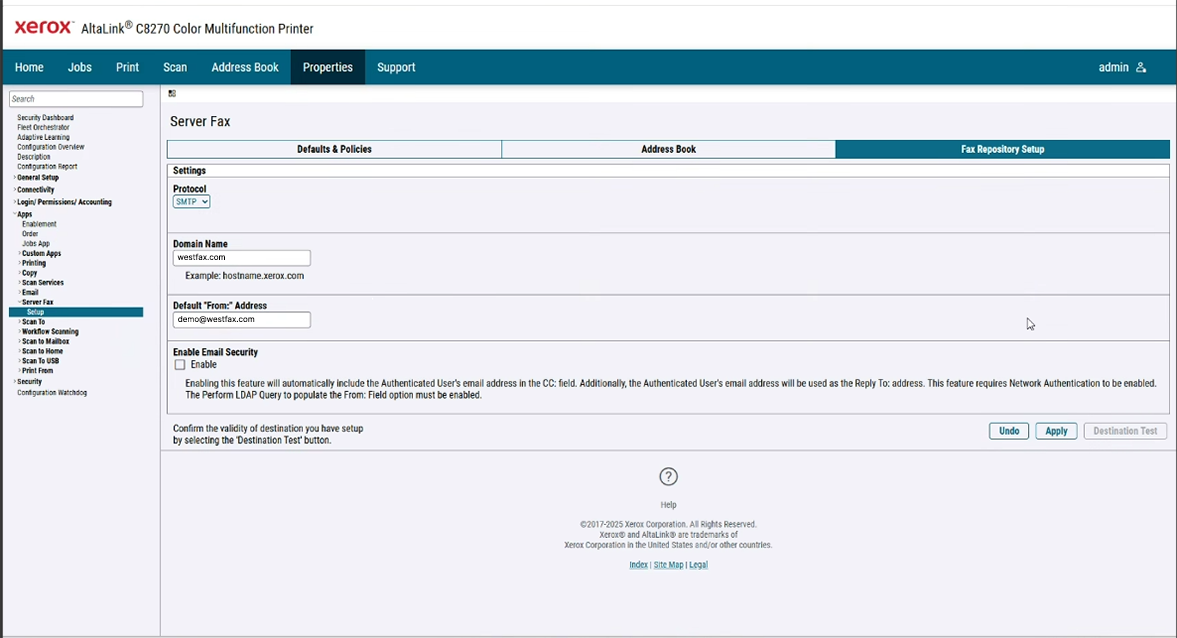
Configure the WestFax Domain Name
This is one of the most important settings. In the Server Fax setup, enter:
- Domain Name: westfax.com
This causes the Xerox device to turn a fax number like 9495551234 into an email destination like 9495551234@westfax.com.
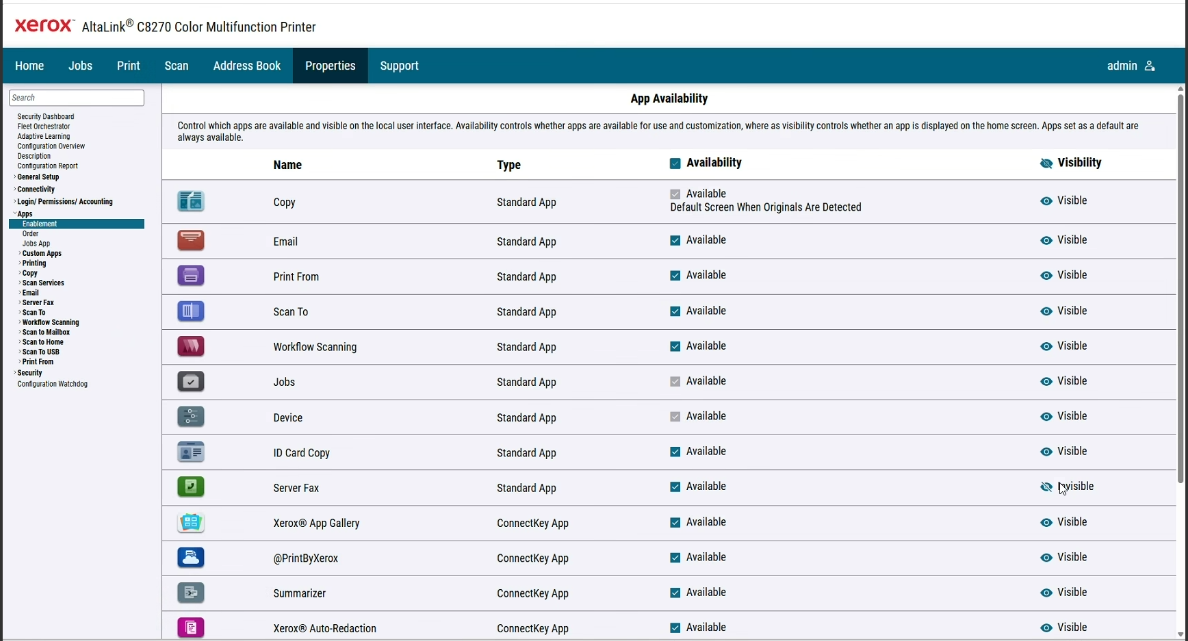
Enable Server Fax on the Walk-Up Display
Make sure the Server Fax app is visible from the Xerox device home screen so users can access it directly.
Send a Fax from the Xerox MFP
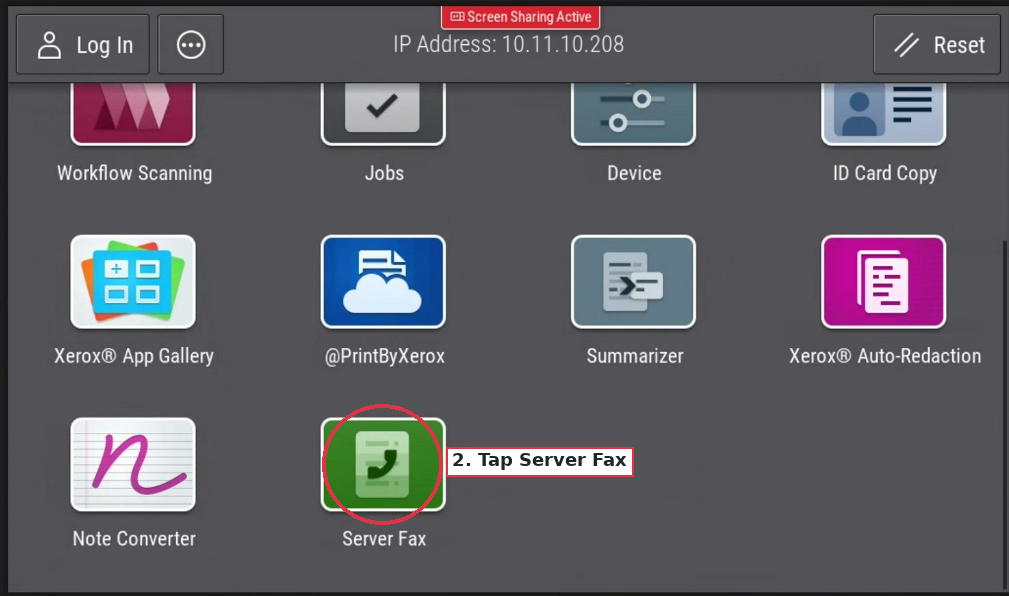
Once the setup is complete, users can send a fax directly from the device.
Start by opening Server Fax on the Xerox touch panel.
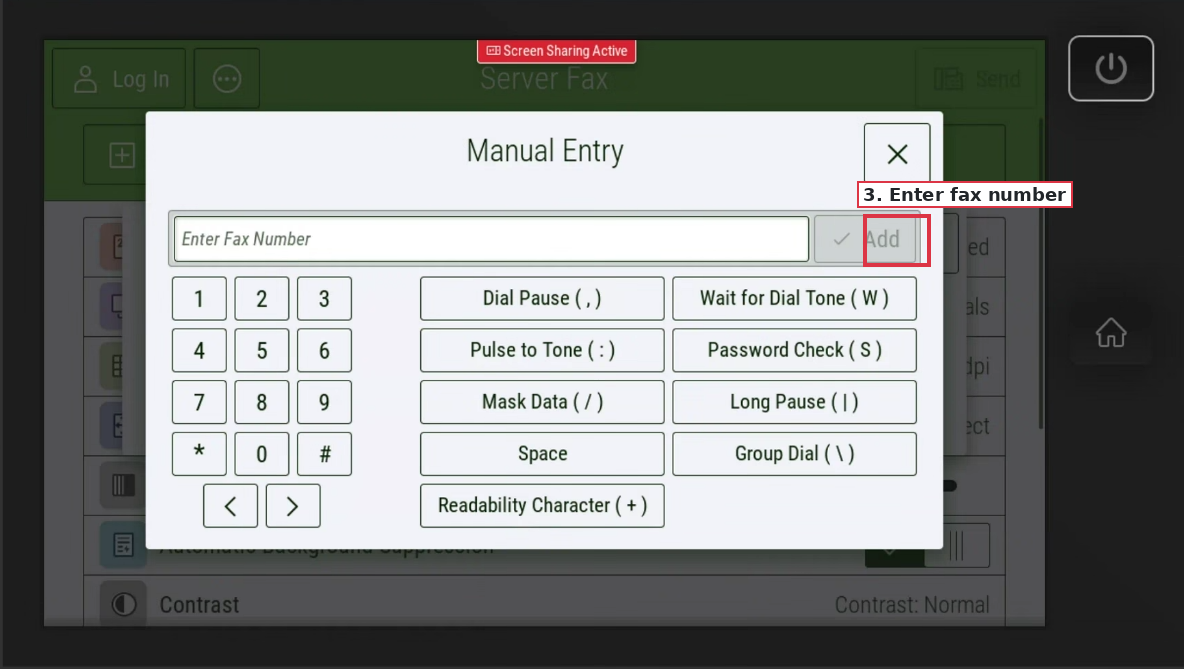
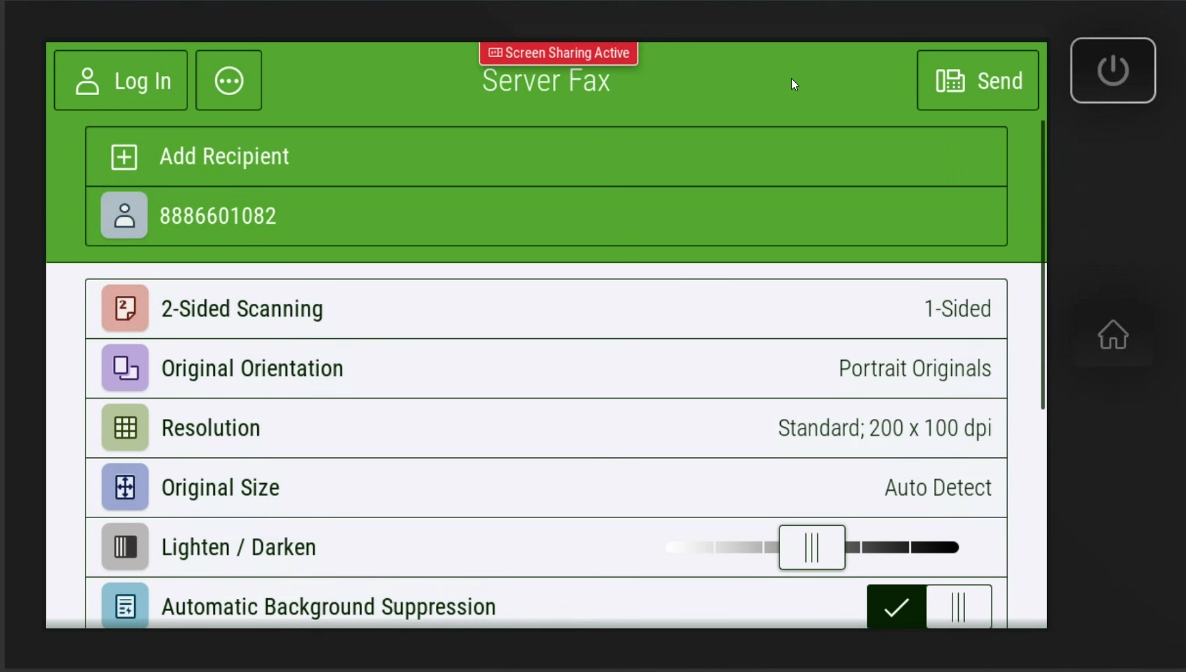
Enter the destination fax number.
Place your document on the glass or in the document feeder and send the fax.
Troubleshooting
- Server Fax is not visible: Make sure it is both visible and enabled in App Availability.
- Fax fails to send: Verify SMTP credentials, encryption settings, and that the sender email is authorized in WestFax.
- Address format issues: Enter only the fax number. Do not manually type @westfax.com unless your device specifically requires it.
- No outbound routing: Confirm the fax domain is set to westfax.com.
Need help? Call us at 800-473-6208 or email sales@westfax.com.