
 Login
Login
Using Cover pages in Email to Fax
Great news! Recently, as you may or may not know, we rolled out built-in cover pages into the Print Driver and the Fax Console. Now we have integrated cover pages into Email to Fax. Now, adding a cover page is as simple as adding a little piece of text to your email subject.

How Email to Fax Works
To add a cover page to a fax sent through Email to Fax, type /cp at the end of your email’s subject line. WestFax automatically attaches your saved default cover page to the document before transmitting it — no manual attachment required. Email to Fax works by addressing your email directly to the recipient’s fax number at westfax.com (for example, 5551112222@westfax.com); any files you attach become the pages of the fax. Adding a cover page used to mean attaching a separate Word or PDF file to every email. Now you only have to design one default cover page in the Fax Console once, and the /cp tag pulls it in automatically for every fax you send afterward.
Create Your Default Cover Page
- First you need to create your cover page. To do this you need to login into the Fax Console site. It is located here at https://home.westfax.com
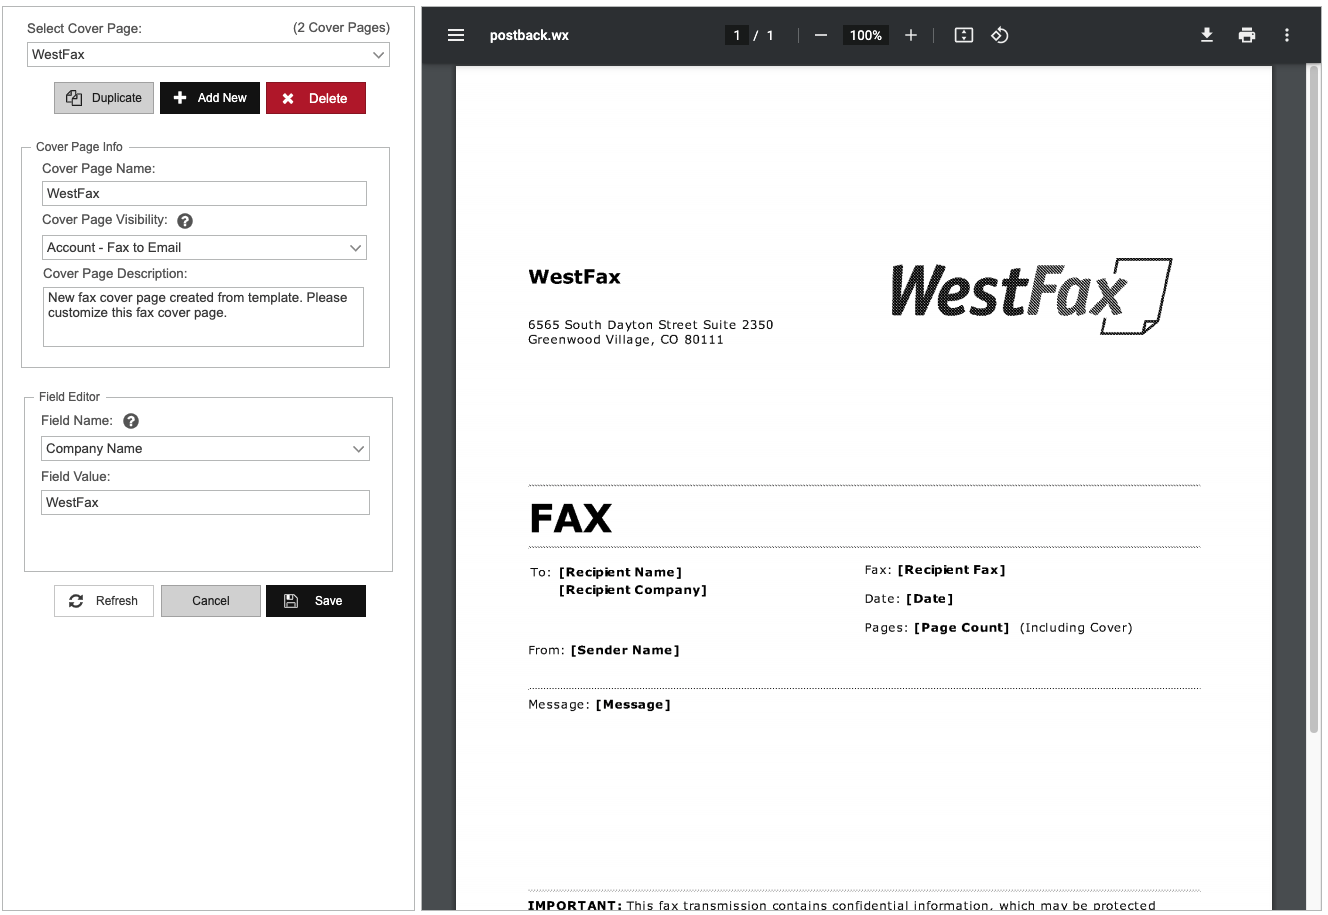
- Now, you want to click on the Settings->Cover Page Designer
- You will see a simple blank cover page come up. See this below:
- Click
the + Add Newbutton - Now you will want to name the cover page
default. This will be the default cover page used for your account. Note: You can have more than one cover page. Just ensure you have one calleddefault. - Ok, so you can then update the
Company Name, Address Block, Logo image, and Footer Text - When you are done click
Save. Thats It! Now you have a default cover page. - You can also watch our fax console video here to learn how to make a cover page.
Ok, now you want to confirm that you are an Allowed Sender. You can do this by going to Settings->Account Settings. Just be sure that your email address in the list of Allowed Senders. Ok, moving forward...
Send a Fax With the /cp Subject Tag
So open any email program you use and create a new email. The to Address should be a FaxNumber@westfax.com. So if you wanted to send a fax to 555-111-2222 you would send the email to 5551112222@westfax.com.
Now add any file attachments. These will be the documents that are converted to a fax and transmitted.
Ok, so you have your attachment, your email (fax address) and all you need to do is type in the Subject. The subject should contain a small simple word or two that will show up on the header of the fax document. In our example below we are using Claim #298493. The only thing you need to do is include a /cp at the end of the subject. (Advanced: You can use /cp coverpagename to specify a different cover page instead of default)
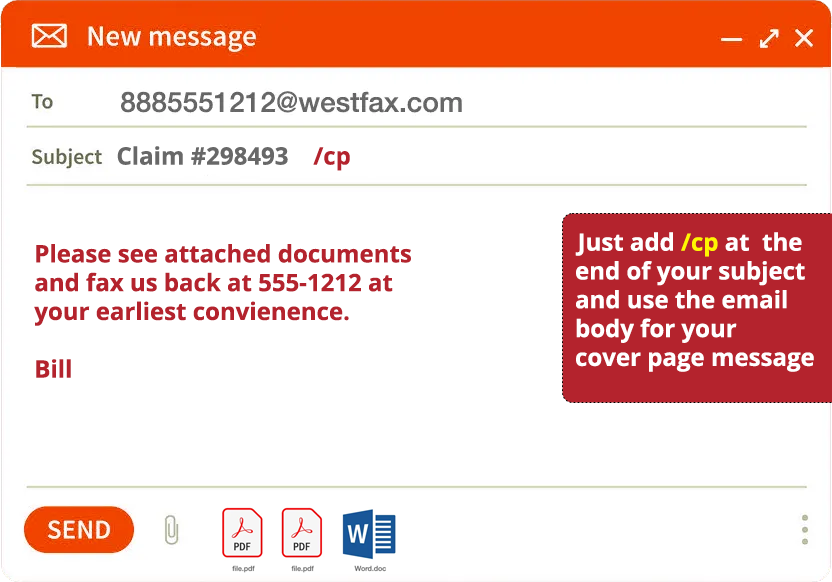
Hit Send! That's it!
Testing and Support
Note: You can send a fax to yourself. Just use your fax number for the to address. This way you can test it out.
If you have any questions please contact us at (800) 473-6208, or via e-mail at info@westfax.com.